|
When it comes to our roofs, they're like the guardians of our homes, shielding us from the storms of life. But what happens when these guardians start to falter, allowing water to seep through the cracks? That's where the dilemma arises – should we opt for roof leak repair or go all-in for a roof replacement? It's a decision that requires careful consideration, weighing the pros and cons, and assessing the long-term impact. So, let's embark on this journey together, as we navigate through the intricacies of roof leak repair and roof replacement, ultimately finding the answer to the age-old question: which is best? Signs of Roof Leak Damage We have identified several key signs of roof leak damage that homeowners should be aware of in order to address the issue promptly and avoid further complications. Detecting roof leaks early is crucial to preventing extensive damage to your home. One of the most common signs of a roof leak is water stains on your ceiling or walls. These stains can range in size and color, and they often indicate that water is entering your home through a leak in the roof. Another sign of a roof leak is the presence of mold or mildew in your home. When water seeps into your home through a roof leak, it creates a damp environment that's ideal for mold and mildew growth. If you notice a musty odor or see mold or mildew in your home, it's important to investigate for a roof leak. Additionally, you may notice that your roof is sagging or drooping in certain areas. This is a clear indication that water has penetrated the structure of your roof and is causing damage. If you notice any changes in the appearance of your roof, it's essential to have it inspected for leaks. It's also important to note that not all roof leak damage is covered by insurance. While some insurance policies may cover the cost of repairing a roof leak, others may only cover the damage caused by the leak, such as water damage to your home's interior. It's crucial to review your insurance policy carefully to understand what's covered and what's not. Importance of Timely Roof Leak Repairs Timely roof leak repairs are crucial to prevent further damage and costly repairs down the line. Ignoring roof leaks can lead to a host of problems that can quickly escalate if not addressed promptly. Here are four reasons why regular maintenance and timely repairs are of utmost importance:
Common Causes of Roof Leaks When it comes to roof leaks, it's important to understand the common causes to effectively address the issue. One common cause is damaged or missing shingles, which can allow water to seep into the roof. Another cause is improper installation of flashing, which can create gaps and lead to leaks. Additionally, age and wear can also contribute to roof leaks. Roof Leak OriginsOne of the most common causes of roof leaks is improper installation. When a roof isn't installed correctly, it can lead to various issues that result in leaks. Here are four key factors that contribute to roof leak origins:
To prevent roof leaks, it's crucial to ensure proper roof installation, regular roof leak detection, and maintenance, including clearing gutters and addressing any damaged or missing shingles promptly. Prevention and SolutionsTo prevent roof leaks and address common causes, it's important to take proactive measures such as regular maintenance and prompt repairs. Regular inspections can help identify potential issues before they become major problems. Clearing debris from the roof and gutters, trimming overhanging branches, and ensuring proper drainage can also prevent water from pooling and causing leaks. Applying a waterproof sealant to vulnerable areas such as flashing, vents, and skylights can provide an added layer of protection. Additionally, regular roof maintenance should include checking for damaged or missing shingles, as well as addressing any signs of wear and tear. If a leak does occur, prompt repairs are crucial to prevent further damage. By following these prevention methods and implementing effective solutions, homeowners can minimize the risk of roof leaks and maintain a watertight roof. Benefits of Roof Leak Repair When it comes to roof leak repair, there are several benefits to consider. Firstly, it's a cost-effective solution compared to a full roof replacement. Repairing the leak promptly can also extend the lifespan of the roof, preventing further damage and potentially saving you from expensive repairs down the line. Cost-Effective SolutionRepairing a roof leak is a cost-effective solution that offers numerous benefits. When it comes to roof leak prevention, opting for repair instead of replacement can save you a significant amount of money. Here are four reasons why roof leak repair is a cost-effective choice:
Extends Roof LifespanBy opting for roof leak repair, homeowners can extend the lifespan of their roof while also enjoying the cost-effective benefits mentioned earlier. Regular maintenance and timely repairs are crucial to preventing further damage and increasing the longevity of your roof. Here are some roof maintenance tips to help extend the lifespan of your roof:
Prevents Further DamageTo prevent further damage and protect the structural integrity of your home, roof leak repair is essential. Ignoring a roof leak can lead to significant problems that can be costly and time-consuming to fix. Here are four reasons why preventing water damage through regular inspections and timely repairs is crucial:
Regular inspections and proactive roof leak repair are vital to preventing further damage and maintaining the longevity of your home. Professional Roof Leak Repair Process We often employ a comprehensive and efficient process to professionally repair roof leaks. When it comes to addressing roof leak issues, it's crucial to first identify the source of the leak. Our team utilizes advanced roof leak detection techniques to pinpoint the exact location of the problem. This includes carefully inspecting the roof for any signs of damage, such as cracked or missing shingles, deteriorated flashing, or damaged vent pipes. Once the source of the leak has been identified, we proceed with the actual repair process. We make sure to use the best materials for roof leak repair to ensure long-lasting results. High-quality roofing materials, such as durable shingles, waterproof sealants, and strong flashing, are essential for effectively sealing the leak and preventing any further damage. Our skilled technicians start by removing any damaged or deteriorated materials around the leak area. This includes replacing any cracked or missing shingles, repairing or replacing damaged flashing, and sealing any gaps or openings in the roof. We ensure that all repairs are done meticulously to guarantee a watertight seal. After the repairs are completed, we conduct a thorough inspection to verify that the leak has been successfully repaired. We check for any signs of moisture or water penetration and ensure that the roof is in optimal condition. If necessary, we may perform additional repairs or recommend maintenance measures to prevent future leaks. DIY Roof Leak Repair Tips Repairing a roof leak on your own can be a cost-effective solution if you have the necessary knowledge and skills. However, it's crucial to approach the task with caution and avoid common DIY roof repair mistakes. Here are some helpful tips to guide you:
Factors to Consider Before Choosing Roof Repair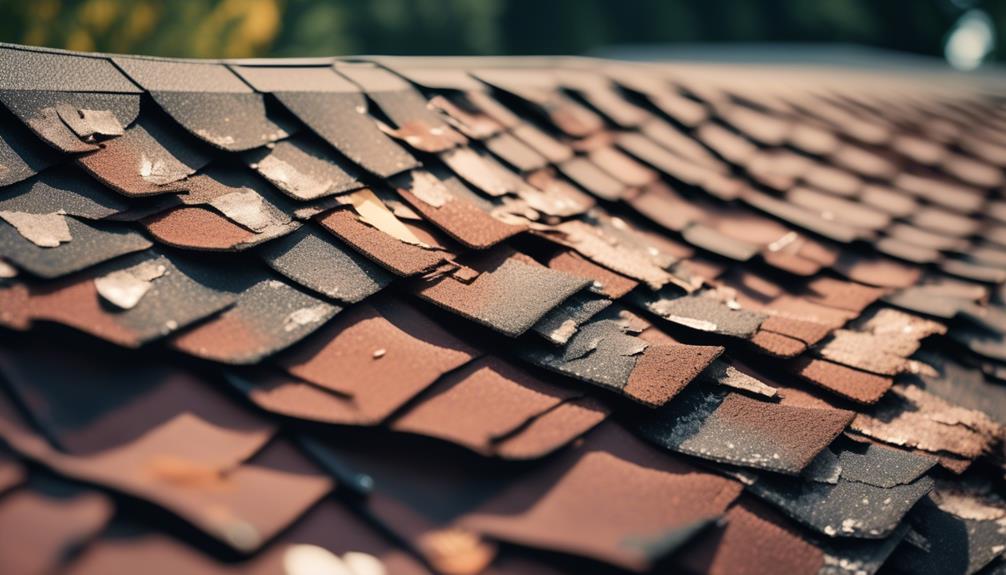 Before choosing a roof repair option, it is important to consider several factors that will help you make an informed decision. One of the key factors to consider is the cost comparison between repair and replacement. It is crucial to weigh the cost of repairing the existing roof against the cost of a full roof replacement. This can help you determine which option is more financially feasible for your situation. To assist in making this comparison, the following table provides a breakdown of the factors to consider:
The cost factor is often the most significant consideration for homeowners. Roof repair generally costs less than a full replacement, making it an attractive option for those on a tight budget. However, if your roof is older or the damage is severe, a full replacement may be necessary to ensure a long-term solution. The age of your roof is another crucial factor to consider. If your roof is relatively new, a repair may be sufficient to address the issue. On the other hand, if your roof is approaching the end of its lifespan, a replacement may be a more practical choice to avoid future problems. Lastly, the extent of the damage should be taken into account. Minor issues such as small leaks or missing shingles can often be repaired, whereas extensive damage to the structure or widespread leaks may require a complete replacement. Cost Comparison: Roof Leak Repair Vs. Roof Replacement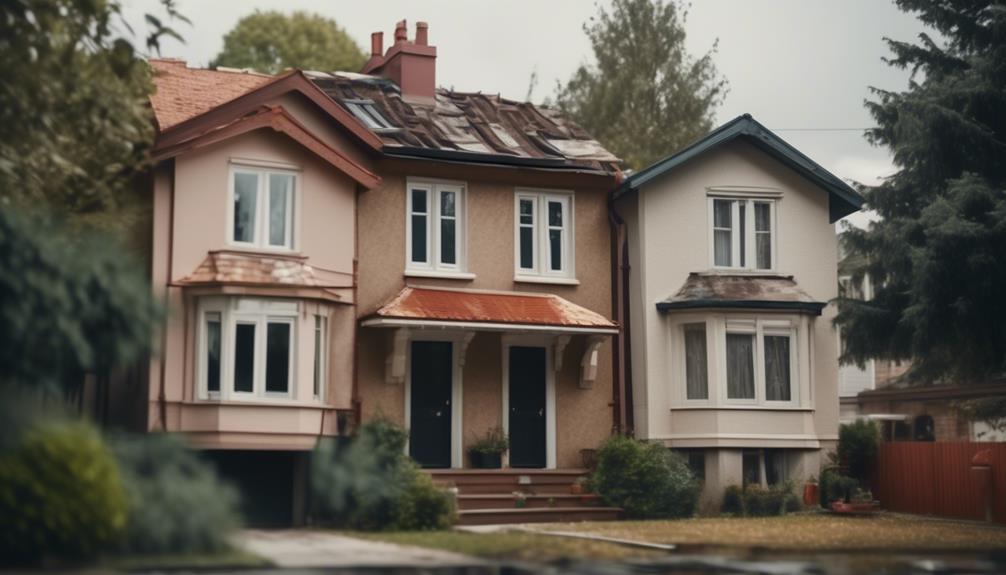 Considering the factors discussed, it's essential to evaluate the cost comparison between roof leak repair and roof replacement. When it comes to addressing roofing issues, cost is a significant factor that homeowners must consider. Here is a breakdown of the cost comparison between roof leak repair and roof replacement:
Ultimately, the decision between roof leak repair and roof replacement will depend on the specific circumstances and budget of the homeowner. It's advisable to consult with a professional roofing contractor to assess the extent of the damage and provide an accurate cost estimate. When Roof Replacement Is Necessary Sometimes, it becomes necessary to replace a roof rather than attempting to repair it. While roof repair can be a cost-effective solution for minor issues, there are certain situations where a roof replacement is the better option. Roof replacement offers several advantages and ensures the longevity and safety of your home. One of the signs that indicate a roof replacement is necessary is extensive damage. If your roof has suffered significant damage due to storms, age, or neglect, repairs may only provide a temporary solution. A new roof will provide better protection and durability, giving you peace of mind for years to come. Another sign is a recurring or persistent leak. If you constantly find yourself dealing with roof leaks despite multiple repair attempts, it may be time for a replacement. A new roof will eliminate the problem at its source, preventing further damage to your home's interior. Additionally, an aging roof is a clear indication for replacement. As roofs age, they become more susceptible to damage and may start showing signs of wear and tear. If your roof is nearing the end of its expected lifespan, investing in a replacement can save you from costly repairs down the line. To further illustrate the advantages of roof replacement, consider the following table:
Frequently Asked QuestionsHow Long Does a Roof Leak Repair Typically Last?Typically, the duration of a roof leak repair depends on various factors such as the severity of the damage, the quality of the repair work, and the overall condition of the roof. However, with proper maintenance and regular inspections, a well-executed roof leak repair can last for several years. To ensure the longevity of the repair, it's essential to address any signs of roof damage promptly and implement effective roof leak prevention measures. Can I Use Roof Sealant to Fix a Roof Leak Temporarily?Yes, roof sealant can be used as a temporary fix for a roof leak. However, its effectiveness may vary depending on the severity of the leak and the type of sealant used. It's important to note that roof sealant isn't a long-term solution and should only be used as a temporary fix until a professional can assess the situation. There are alternative temporary fixes available, such as using a tarp or applying roofing cement to the affected area. Are There Any Health Risks Associated With a Roof Leak?There are potential health risks associated with a roof leak. Mold and mildew can thrive in damp environments, leading to respiratory problems and allergies. It's important to take preventive measures to avoid these health effects. Regular inspections and maintenance can help identify and address leaks early on. Promptly repairing any leaks and addressing water damage can minimize the risk of mold growth and protect your health. What Should I Do if I Notice Water Stains on My Ceiling but Can't Find the Source of the Leak?If you notice water stains on your ceiling but can't find the source of the leak, there are a few things you can do. Start by checking your attic for any signs of water damage. Look for wet insulation, mold, or discoloration on the wood. If you still can't locate the leak, it may be time to call in professional roof leak detection services. These experts have the tools and knowledge to find the source of the leak and recommend the best course of action. Is It Possible to Claim Insurance for Roof Leak Repairs?Claiming insurance for roof leak repairs is possible, depending on your policy. It's important to contact your insurance provider as soon as possible to report the issue and inquire about coverage. In the meantime, taking preventative measures to minimize further damage is crucial. Regular roof inspections and maintenance can help identify and address potential leaks before they become major problems. Remember to document any damage and keep records of repairs for insurance purposes. from https://universalroofs.ca/roof-repair-solutions/roof-leak-repair-or-roof-replacement-which-is-best/
0 Comments
Alright folks, let's talk about the nifty little task of fixing pesky roof leaks. We've all been there, right? You're enjoying a lazy Sunday morning, sipping on your cup of joe, when suddenly, drip, drip, drip…the sound of water invading your peaceful abode. Well, fear not, because we have just the solution for you. In this quick and easy guide, we'll walk you through the steps to:
So, hang tight and get ready to bid farewell to those unwanted drips! Identifying the Leak Source To effectively address a roof leak, the first step is identifying the precise source of the water intrusion. It's crucial to diagnose the problem accurately in order to prevent further damage and ensure a successful repair. There are several common causes of roof leaks that homeowners should be aware of. These include damaged or missing shingles, cracked flashing, clogged gutters, and inadequate roof ventilation. By examining these potential culprits, we can determine the exact location of the leak and take appropriate action. When it comes to preventing future leaks, there are a few key steps to keep in mind. First and foremost, regular roof inspections are essential. By inspecting your roof at least once a year, you can identify and address any potential issues before they escalate into costly leaks. Additionally, proper maintenance is crucial. This includes keeping your gutters clean and free of debris, as clogged gutters can lead to water backup and roof damage. Ensuring that your roof is properly ventilated is also important. Poor ventilation can cause moisture buildup, leading to roof leaks and other problems. Gathering the Necessary Tools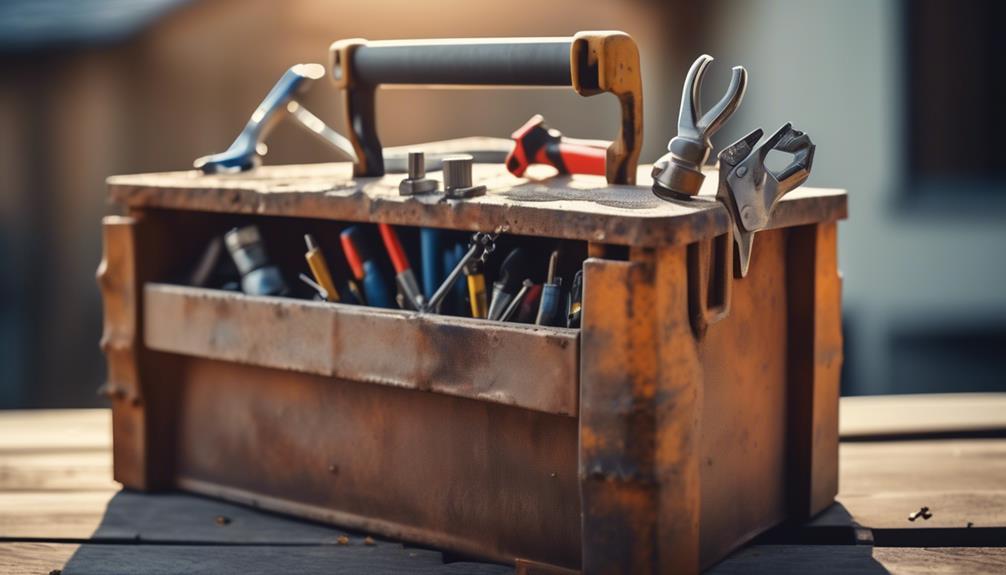 We will now discuss the important step of gathering the necessary tools for repairing a roof leak. When it comes to fixing a roof leak, having the right tools is essential. These tools will help you identify and fix the source of the leak efficiently and effectively. Here are some roof leak repair tips and the essential repair tools you'll need. First and foremost, you'll need a ladder to safely access your roof. Make sure the ladder is sturdy and in good condition before using it. Additionally, you'll need a safety harness or rope to secure yourself while working on the roof. Safety should always be a top priority when working at heights. Next, you'll need a flashlight to inspect the roof for any signs of damage or leaks. A good quality flashlight will help you see in dark or hard-to-reach areas. Additionally, a pair of gloves and safety goggles will protect your hands and eyes during the repair process. To fix the leak, you'll need a caulking gun and roofing sealant. These tools will help you seal any cracks or gaps in the roof. It's important to choose a high-quality sealant that's specifically designed for roof repairs. Lastly, you may also need a pry bar or a putty knife to remove any damaged or deteriorated materials. This will allow you to replace them with new ones, ensuring a long-lasting repair. Preparing the Roof Surface Preparing the roof surface is an essential step in ensuring a successful and long-lasting roof repair. Before applying any sealant or patching materials, it is crucial to clean the roof thoroughly and employ effective waterproofing techniques. Roof cleaning helps remove dirt, debris, and algae, allowing the repair materials to adhere better and ensuring a more secure fix. To prepare the roof surface properly, follow these steps:
By following these steps, you will ensure that the roof surface is clean and ready for repair. This will allow the sealant or patching materials to adhere properly, preventing further leaks and extending the lifespan of your roof.
Applying the Patching Material Now let's delve into the process of applying the patching material to effectively repair the roof leak. When it comes to applying techniques for roof leak repair, there are a few important steps to follow. Here are the key points to keep in mind:
Inspecting and Testing the Repair To ensure the effectiveness of the roof leak repair, it's essential to thoroughly inspect and test the patched area. Regular roof maintenance is crucial in preventing leaks and prolonging the life of your roof. By inspecting and testing the repair, you can identify any potential issues and address them promptly. One of the most common signs of a roof leak is water stains on the ceiling or walls. These stains are usually yellow or brown and may appear in a circular or irregular shape. Another sign to look out for is water dripping or pooling in your attic or on the floor. You may also notice mold or mildew growth, which can indicate a hidden leak. It's important to address these signs immediately to prevent further damage to your home. When inspecting the repaired area, check for any signs of moisture or water intrusion. Look for any discoloration or dampness on the ceiling or walls. Use a flashlight to inspect the attic for any signs of water or mold. Pay attention to any unusual odors, as they can be a sign of hidden moisture. To test the repair, you can use a hose to simulate rainfall. Spray water on the patched area and observe if any water seeps through. It's important to perform this test carefully and thoroughly, ensuring that the repair can withstand heavy rain. Frequently Asked QuestionsCan I Use the Same Patching Material for All Types of Roofs?In our experience, it isn't recommended to use the same patching material for all types of roofs. Different types of roofs require different materials for effective repair. It's important to consider the specific needs and characteristics of each roof type when selecting suitable materials. Using the appropriate materials can ensure a long-lasting and reliable repair. Therefore, it's advisable to consult with a professional or refer to specific guidelines for each roof type to determine the most suitable patching material. How Long Will the Repair Last?The repair longevity can vary depending on several factors. Common causes for roof leaks include damaged shingles, clogged gutters, and improper installation. If these issues are addressed and the repair is done correctly, it should last for a considerable amount of time. However, it's important to note that regular maintenance and inspections are necessary to ensure the longevity of the repair. Neglecting these tasks could lead to further damage and potential leaks in the future. What Are the Potential Risks of Repairing a Roof Leak on My Own?Safety hazards should be a primary concern when considering DIY roof leak repair. Without professional assistance, there are potential risks involved. Climbing onto the roof can be dangerous, especially without proper safety equipment. In addition, if the repair isn't done correctly, it may lead to further damage and costly repairs in the future. It's always recommended to consult with a professional for roof leak repair to ensure safety and long-lasting results. Are There Any Special Precautions I Need to Take While Applying the Patching Material?Special precautions and safety measures must be taken when applying patching material for roof leak repair. It's essential to wear protective gear, such as gloves and safety goggles, to prevent any potential injuries. Additionally, ensure that the surface is clean and dry before applying the patch, as moisture can affect its effectiveness. Taking these precautions will help ensure a successful repair and minimize any risks or further damage to your roof. How Can I Prevent Future Roof Leaks After Making the Repair?To prevent future roof leaks after making the repair, there are a few maintenance tips for a leak-free roof that we can follow. Firstly, regularly inspect the roof for any signs of damage such as cracked or missing shingles. Secondly, keep the gutters clean and free from debris to ensure proper water drainage. Lastly, address any potential causes of roof leaks, such as improper ventilation or flashing, to prevent future issues. from https://universalroofs.ca/roof-repair-solutions/quick-and-easy-roof-leak-repair-guide/ Leaking skylight roofs can be a real thorn in our side, but fear not, for we have some helpful tips to shed light on this issue. Picture this: you're sitting comfortably in your home, enjoying the gentle pitter-patter of raindrops on your skylight, when suddenly, you notice a suspicious drip. What do you do next? Well, in this discussion, we will uncover the common causes of skylight roof leaks, explore the signs that indicate a leak, and provide you with essential tips for repairing and preventing future leaks. So, let's get started and put a stop to those pesky skylight leaks once and for all. Common Causes of Skylight Roof Leaks One of the most common causes of skylight roof leaks is improper installation. When skylights aren't installed correctly, gaps and openings can form between the skylight and the roof, allowing water to seep in during rainstorms. It's important to ensure that the skylight is properly sealed and secured to prevent leaks. To prevent skylight roof leaks, there are several key steps that can be taken. First, it's crucial to hire a professional to install the skylight. They have the expertise and knowledge to ensure that the installation is done correctly and that all necessary precautions are taken. DIY installation can lead to mistakes and potential leaks. If you already have a skylight installed and are experiencing leaks, there are some DIY repair tips that can help. Start by inspecting the skylight for any visible signs of damage or wear. Look for cracks, gaps, or loose seals. These should be addressed immediately to prevent further leakage. Next, clean the skylight and its surrounding area thoroughly. Debris, such as leaves or dirt, can contribute to leaks by clogging drainage systems or creating additional pressure on the skylight. Regular cleaning and maintenance can help prevent these issues. Signs of a Skylight Roof Leak There are several signs that can indicate a skylight roof leak. It is important to be aware of these signs so that prompt action can be taken to repair the leak and prevent further damage. Here are some common signs to look out for:
These signs are indicative of a skylight roof leak and should not be ignored. If any of these signs are observed, it is important to take immediate action to address the issue. Ignoring a skylight roof leak can lead to further damage, such as water damage to the surrounding structure or the growth of mold and mildew. To prevent skylight roof leaks and prolong the lifespan of your skylight, regular maintenance is essential. Here are some skylight maintenance tips to keep in mind:
Preparing for Skylight Roof Leak Repair To properly prepare for skylight roof leak repair, it's important to gather the necessary tools and materials. By having everything ready before starting the repair process, you can ensure a smoother and more efficient job. One of the key aspects of preparing for skylight roof leak repair is preventing leaks in the future. By addressing any underlying issues and taking preventative measures, you can avoid future leaks and the need for further repairs. When it comes to DIY repair methods, there are a few essential tools and materials you'll need. Firstly, you'll need a ladder or scaffolding to safely access the skylight and roof area. Make sure the ladder is stable and secure before climbing up. Additionally, you'll need a caulking gun and high-quality silicone sealant to seal any gaps or cracks around the skylight frame. It's crucial to choose a sealant specifically designed for outdoor use and capable of withstanding harsh weather conditions. In addition to tools, it's important to have proper safety equipment. This includes gloves, safety glasses, and a dust mask to protect yourself from any debris or harmful substances. Additionally, having a tarp or plastic sheeting to cover the surrounding area can help protect your home from any potential water damage during the repair process. Inspection and Assessment of the Skylight Roof Leak Before moving on to inspecting and assessing the skylight roof leak, it is crucial to thoroughly examine the surrounding area for any visible signs of damage or potential sources of the leak. This initial inspection will help determine the extent of the problem and guide the subsequent repair process. To facilitate the inspection and assessment of the skylight roof leak, it is recommended to use a combination of visual inspection techniques and water damage assessment. Visual inspection involves carefully examining the skylight itself, as well as the surrounding roof area, for any obvious signs of damage such as cracks, gaps, or missing shingles. Additionally, it is important to check for any signs of moisture, such as water stains or discoloration on the ceiling or walls near the skylight. In order to further assess the extent of the leak and identify any hidden damage, a water damage assessment is necessary. This involves conducting water tests by spraying water on the skylight and observing for any signs of leakage or water infiltration. It is important to conduct these tests systematically, starting from the highest point of the skylight and working downwards, to accurately pinpoint the source of the leak. To summarize the inspection and assessment process, we have created the following table to provide a visual representation of the key steps involved:
Essential Tools and Materials for Skylight Roof Leak Repair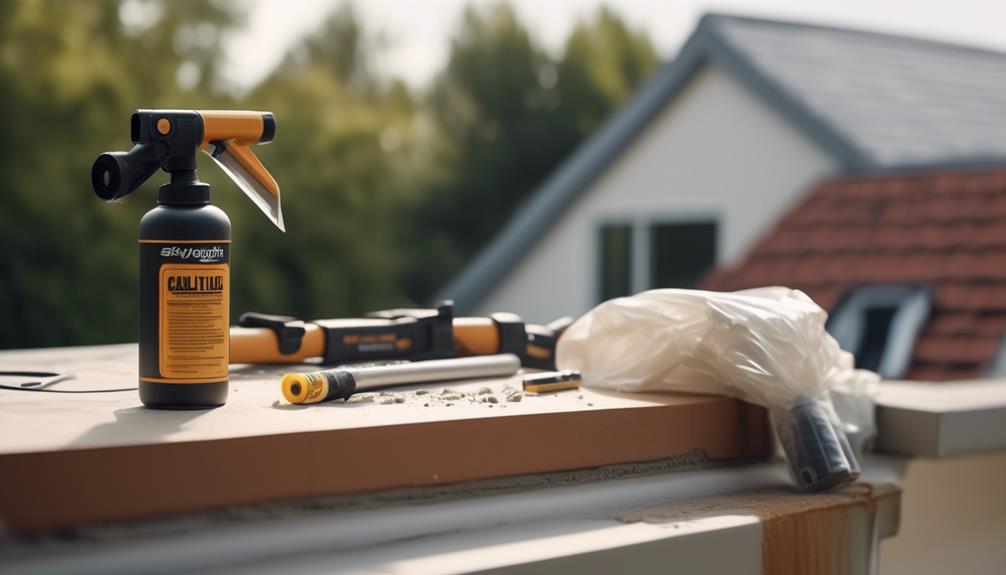 When it comes to repairing a skylight roof leak, having the right tools and materials is essential. We need to make sure we have the necessary tools for the job, such as a ladder, a hammer, a utility knife, and a caulking gun. Additionally, we should have materials like roofing cement, flashing, sealant, and silicone caulk to properly fix the leak. It's important to have all these essential repair equipment on hand to effectively address the skylight roof leak. Tools for Skylight RepairWe highly recommend having the following essential tools and materials on hand for successful skylight roof leak repair:
These tools will aid in addressing common skylight problems such as leaks and water damage. By using the proper skylight repair techniques and having these tools readily available, you can effectively fix any issues and ensure a watertight seal for your skylight. Materials Needed for RepairTo successfully repair a skylight roof leak, it's essential to have the following tools and materials readily available.
Essential Repair EquipmentHaving the right tools and materials is crucial for successfully repairing a skylight roof leak. To ensure a smooth repair process, here are some essential equipment and materials you'll need:
When choosing the right repair materials, it's important to opt for products specifically designed for skylight repair techniques. Look for materials that offer durability, weather resistance, and compatibility with your existing skylight system. Step-By-Step Guide to Repairing a Skylight Roof Leak Repairing a skylight roof leak can be accomplished by following a step-by-step guide that ensures a thorough and effective solution. To begin the process, it's essential to conduct a thorough inspection of the skylight and the surrounding area. Look for any signs of damage, such as cracks, gaps, or loose flashing. Pay attention to the condition of the sealant and ensure that it's intact and properly applied. Once the inspection process is complete, you can proceed with the DIY repair techniques. The first step is to clean the area around the skylight thoroughly. Remove any debris, dirt, or moss that may have accumulated. This will ensure a proper seal and prevent any further damage. Next, apply a high-quality roofing sealant to the damaged areas. Make sure to follow the manufacturer's instructions for application. Pay special attention to the edges of the skylight and the flashing, as these are common areas for leaks to occur. Use a caulking gun for precise and controlled application. After applying the sealant, carefully inspect the area once again to ensure that all damaged areas have been properly addressed. Allow the sealant to dry completely before testing the repair. To do this, spray water on the skylight and observe if any leaks occur. If there are no leaks, the repair has been successful. Tips for Preventing Future Skylight Roof Leaks To prevent future skylight roof leaks, it's important to regularly inspect and maintain the skylight and its surrounding area. By implementing prevention techniques and following proper maintenance practices, you can ensure the longevity and effectiveness of your skylight. Here are some tips to help you prevent future skylight roof leaks:
Hiring a Professional for Complex Skylight Roof Leak Repairs When it comes to complex skylight roof leak repairs, it's often best to hire a professional. These types of repairs require expertise and knowledge that most homeowners don't possess. Professionals have access to specialized equipment and tools that can effectively fix the problem, ensuring a long-lasting repair. Expertise for Complex RepairsFor complex skylight roof leak repairs, it's advisable to hire a professional with expertise in this area. Complex repairs require specialized knowledge and skills to identify and address the underlying issues effectively. Here are some reasons why hiring a professional for complex skylight roof leak repairs is essential:
Professional Equipment and ToolsHiring a professional with expertise in complex skylight roof leak repairs ensures access to the necessary professional equipment and tools. Professionals have specialized tools that are specifically designed for repairing skylights, such as sealant applicators, caulking guns, and flashing tools. These tools allow them to work efficiently and effectively, ensuring that the repair is done correctly. On the other hand, common DIY mistakes often stem from not having the proper equipment. For instance, using the wrong type of sealant or not applying enough sealant can result in leaks and further damage. By hiring a professional, you can be confident that they have the necessary equipment and expertise to handle complex skylight roof leak repairs. Frequently Asked Questions About Skylight Roof Leak Repair To address common concerns about skylight roof leak repair, we'll provide expert advice and practical solutions in a concise and informative manner. Here are some frequently asked questions about skylight roof leak repair:
Frequently Asked QuestionsHow Long Does It Typically Take to Repair a Skylight Roof Leak?On average, repairing a skylight roof leak can take anywhere from a few hours to a couple of days, depending on the severity of the issue. Signs of a skylight roof leak may include water stains on the ceiling, dampness around the skylight, or even water dripping through the skylight itself. It's important to address these issues promptly to prevent further damage to your roof and home. Can I Repair a Skylight Roof Leak on My Own, or Do I Need to Hire a Professional?When it comes to repairing a skylight roof leak, the decision between DIY or hiring a professional is crucial. While attempting to fix it ourselves may seem cost-effective, it's important to consider the expertise and experience that professionals bring to the table. DIY repairs can lead to costly mistakes and potential damage to your roof. Hiring a professional ensures a job done right the first time, saving you time, money, and unnecessary stress. Are There Any Temporary Fixes I Can Do to Stop a Skylight Roof Leak Until I Can Get It Repaired?There are temporary fixes we can do ourselves to stop a skylight roof leak until we can get it repaired. DIY solutions such as applying a waterproof sealant or using a tarp to cover the affected area can help prevent further water damage. However, it's important to note that these fixes are temporary and should be followed by professional repairs as soon as possible to ensure a long-term solution to the leak. What Are Some Common Mistakes to Avoid When Repairing a Skylight Roof Leak?Common mistakes can often be made when repairing a skylight roof leak. To avoid these pitfalls, it's important to follow some helpful tips. By being aware of these mistakes, we can prevent further damage and ensure a successful repair. It's crucial to properly identify the source of the leak and not rush through the repair process. Taking the time to thoroughly inspect the skylight and using the correct materials will also greatly contribute to a successful outcome. Will Repairing a Skylight Roof Leak Affect the Warranty on My Skylight?Repairing a skylight roof leak may have an impact on the warranty of your skylight. DIY repairs, if not done properly, can void the warranty. It's crucial to follow the manufacturer's instructions and guidelines for repairs to ensure the warranty remains valid. If you're unsure about how to repair the leak or if it's covered under warranty, it's recommended to consult a professional to avoid any potential warranty issues. from https://universalroofs.ca/roof-repair-solutions/skylight-roof-leak-repair-tips/ When it comes to new constructions, the last thing you want is for water to seep through the roof and ruin all your hard work. That's why it's absolutely crucial to address any potential roof leaks head-on. In this discussion, we'll explore three essential roof leak repairs that can save you from potential disaster. From proper sealing of roof penetrations to the installation of a durable waterproofing membrane, these repairs are vital for ensuring the longevity and integrity of your new construction. But wait, there's more! We'll also reveal a third repair that is often overlooked but can make all the difference in preventing leaks. So, let's get started and discover how to safeguard your new construction from the unpredictable forces of nature. Proper Sealing of Roof PenetrationsTo ensure proper maintenance and prevent potential leaks, it's imperative to effectively seal all roof penetrations in new constructions. Common roof leaks are often caused by poorly sealed roof penetrations, which can include vent pipes, skylights, chimneys, and HVAC units. These openings can allow water to seep into the roof system, causing damage to the structure and potentially leading to costly repairs. When it comes to DIY roof leak repairs, properly sealing roof penetrations is a task that can be accomplished with some basic knowledge and the right materials. The first step is to identify the type of penetration and determine the appropriate sealing method. For example, vent pipes can be sealed using flashing collars and sealant, while skylights may require the use of specialized flashing kits. Before applying any sealant, it's crucial to clean the area thoroughly and remove any debris or old sealant. This will ensure a proper bond between the surface and the sealant. Once the area is clean, apply a generous amount of sealant around the penetration, making sure to cover any gaps or openings. Use a putty knife or caulking gun to spread the sealant evenly and create a watertight seal. After the sealant has been applied, it's important to inspect the area for any signs of damage or deterioration. Monitor the sealed penetrations regularly and address any issues promptly to prevent leaks from occurring. Installation of a Durable Waterproofing Membrane After properly sealing all roof penetrations to prevent potential leaks, the next step in ensuring a leak-free roof for new constructions is the installation of a durable waterproofing membrane. This membrane acts as an effective moisture barrier, providing long-lasting protection for the roof. A durable waterproofing membrane is a crucial component in the construction of a leak-free roof. It's designed to withstand extreme weather conditions, including heavy rain, snow, and UV exposure. By effectively sealing the roof surface, it prevents water from penetrating into the underlying structure and causing damage. When selecting a waterproofing membrane, it's important to choose a high-quality product that offers long-lasting performance. Look for membranes that are specifically designed for roofing applications and have a proven track record in the industry. These membranes are typically made from synthetic materials such as PVC, TPO, or EPDM, which provide excellent durability and resistance to water. During installation, the waterproofing membrane is carefully applied to the roof surface, ensuring full coverage and a tight seal. It's important to follow the manufacturer's guidelines and use proper installation techniques to ensure the membrane's effectiveness. This includes properly overlapping seams, using compatible adhesives, and ensuring proper drainage to prevent water accumulation on the roof. Regular Inspection and Maintenance of Roof Flashings Regularly inspecting and maintaining roof flashings is essential for preventing leaks and maintaining the integrity of the roof structure. Roof flashings are the metal pieces that protect the vulnerable areas of the roof, such as joints, corners, and transitions. Here are three reasons why roof flashing maintenance and professional inspections are of utmost importance:
To ensure the best results, it's crucial to hire a professional roofing contractor for regular inspections and maintenance of roof flashings. These professionals have the knowledge, experience, and tools necessary to identify and address any issues with the flashings effectively. Their expertise ensures that the flashings are properly installed, sealed, and maintained, providing optimal protection against leaks and maintaining the integrity of the roof structure. Don't underestimate the importance of regular roof flashing maintenance and professional inspections – they can save you from expensive repairs and protect your investment in the long run. Frequently Asked QuestionsHow Can I Identify Roof Leaks in New Constructions Before They Cause Significant Damage?To prevent leaks in new constructions and detect them early, it's crucial to be proactive. Regularly inspect the roof for any signs of damage or potential weak spots. Look for missing or damaged shingles, cracked flashing, or clogged gutters. Additionally, ensure proper installation of the roofing materials and adequate waterproofing measures. By identifying and addressing these issues early on, you can prevent significant damage and costly repairs in the future. Are There Any Specific Steps or Materials Required to Properly Seal Roof Penetrations in New Constructions?When it comes to sealing roof penetrations in new constructions, there are indeed specific steps and materials required. First, we need to thoroughly inspect the area for any potential leaks. Then, we can proceed with applying a high-quality sealant that's designed for roof penetrations. Additionally, using flashing materials and ensuring proper installation is crucial. What Are Some Common Mistakes to Avoid When Installing a Durable Waterproofing Membrane on a New Construction Roof?When it comes to proper installation of a durable waterproofing membrane on a new construction roof, there are some common mistakes that should be avoided. One of these is improper surface preparation, which can lead to poor adhesion and potential leaks. Another mistake isn't using the correct type of membrane for the specific roofing system, which can result in inadequate protection. It's important to carefully follow manufacturer guidelines and ensure proper installation techniques to avoid these common pitfalls. How Often Should Roof Flashings Be Inspected and Maintained to Prevent Potential Leaks in New Constructions?Roof flashings should be inspected and maintained regularly to prevent potential leaks in new constructions. The frequency of roof flashing maintenance depends on various factors such as climate, roof material, and local building codes. However, a general rule of thumb is to inspect and maintain roof flashings at least once a year. This proactive approach ensures early detection of any issues and allows for timely repairs, ultimately preventing costly water damage and preserving the integrity of the roof. Are There Any Additional Measures or Precautions That Can Be Taken to Ensure the Long-Term Effectiveness of Roof Leak Repairs in New Constructions?To ensure the long-term effectiveness of roof leak repairs in new constructions, there are additional measures and precautions that can be taken. Regular long-term maintenance is crucial in preventing potential leaks. This includes inspecting and maintaining roof flashings, as well as checking for any signs of damage or wear. Additionally, implementing preventative measures such as proper insulation and ventilation can help minimize the risk of future leaks. from https://universalroofs.ca/roof-repair-solutions/3-essential-roof-leak-repairs-for-new-constructions/ By chance, we stumbled upon a topic that many homeowners might find themselves grappling with: roof leak repair in older homes. As we all know, homes age and with time, their roofs can develop pesky leaks that can wreak havoc on the interior. But fear not, for we have compiled the ultimate guide to help you navigate this common issue. From identifying the causes and signs of a roof leak to providing step-by-step instructions for DIY repair and advice on when to call in the professionals, we've got you covered. So, if you're tired of dealing with that persistent drip or worried about the potential damage it may cause, stick around for some practical solutions and preventive measures that will put your mind at ease. Common Causes of Roof Leaks in Older Homes In our experience, the most common causes of roof leaks in older homes include deteriorated flashing, cracked or missing shingles, and improper installation of roofing materials. These issues can lead to water seepage, resulting in significant damage to the interior of the house if left unaddressed. It's essential to understand the common signs of roof leaks and take necessary prevention measures. One of the telltale signs of a roof leak is water stains on the ceiling or walls. These stains may appear as discolored patches or streaks and often indicate the presence of water infiltration. Another common sign is the presence of mold or mildew in the attic or upper floors. Moisture from a roof leak creates a favorable environment for mold growth, which can pose health risks and further damage the structure. To prevent roof leaks, regular inspection and maintenance are crucial. One preventive measure is to check the flashing, which is the thin metal strip installed around chimneys, vents, and skylights. Over time, flashing can deteriorate or become loose, allowing water to penetrate the roof. Replacing damaged or missing flashing can help prevent leaks. Additionally, ensuring that shingles are intact and properly installed is essential. Cracked or missing shingles create vulnerabilities in the roof system, making it easier for water to seep through. Regularly inspecting and replacing damaged shingles can help maintain the integrity of the roof. Lastly, improper installation of roofing materials is a common cause of roof leaks in older homes. It's essential to hire experienced professionals who follow industry best practices when installing or repairing a roof. This ensures that all components are correctly installed and sealed, reducing the risk of leaks. Signs of a Roof Leak in an Older Home As experienced roofing professionals, we've encountered numerous signs of roof leaks in older homes. One of the most common indicators is aging roof vulnerabilities, such as cracked or missing shingles, deteriorated flashing, or sagging gutters. Another telltale sign is interior water damage, such as stained ceilings, peeling paint, or warped floors. Identifying these signs early on is crucial in preventing further damage and addressing the roof leak promptly. Aging Roof VulnerabilitiesWhat are the telltale signs of a roof leak in an older home? As roofs age, they become more vulnerable to damage and leaks. One common vulnerability is deteriorating shingles. Over time, shingles can become cracked, curled, or missing, leaving the underlying roof structure exposed to the elements. This can lead to leaks during heavy rain or snow. Another aging vulnerability is poor roof maintenance. Neglecting regular roof maintenance, such as cleaning debris and clearing gutters, can result in water pooling on the roof's surface. This prolonged exposure to moisture can weaken the roof's integrity and increase the risk of leaks. It's crucial for homeowners of older houses to be vigilant for these signs and address them promptly to prevent further damage and costly repairs. Interior Water DamageAfter identifying the vulnerabilities of an aging roof, it's important to recognize the interior water damage that can occur as a result of a roof leak in an older home. When water penetrates through the roof, it can cause significant damage to the interior of the house. Here are three key points to consider:
Essential Tools and Materials for Roof Leak Repair When it comes to repairing roof leaks in older homes, having the right tools and materials is essential. As experienced professionals, we know that using the proper tools can make all the difference in the success of a repair job. Some of the essential tools for roof leak repair include a ladder, roofing hammer, utility knife, and a caulking gun. Additionally, having the right materials such as roofing cement, flashing, and shingles is crucial to ensuring a long-lasting and effective repair. Tools for Roof Leak RepairTo effectively perform roof leak repair, it's essential to have a set of tools and materials specifically designed for the task. Here are three essential items that every homeowner should have for roof leak repair:
Having these tools and materials on hand will allow you to quickly and effectively repair any roof leaks, preventing further damage to your home. Materials for Roof Leak RepairHaving the right tools and materials is crucial for effectively repairing roof leaks in older homes. When it comes to materials, there are a few key options to consider. For temporary fixes, you can use materials such as roofing cement, roofing tape, or rubberized roof patching compound. These materials are designed to provide a quick and easy solution to stop leaks temporarily. However, for long term solutions, it's recommended to use more durable materials. These include roof sealants, roof coatings, and roofing membranes. Roof sealants create a waterproof barrier and can be applied to various types of roofing materials. Roof coatings provide an extra layer of protection and can extend the lifespan of your roof. Roofing membranes, such as EPDM or TPO, are highly resistant to leaks and can provide a long-lasting solution. Step-By-Step Guide to Locating the Source of a Roof Leak To effectively pinpoint the source of a roof leak, our experienced team utilizes a detailed, step-by-step guide that ensures precision and accuracy in identifying the issue. Here is our proven method for locating roof leaks:
By following this step-by-step guide, we're able to identify leaks accurately and efficiently. This allows us to provide targeted roof leak repair solutions that address the root cause of the problem. Moreover, by identifying leaks early on, we can also implement appropriate roof leak prevention techniques to minimize the risk of future leaks and water damage. With our experience and expertise, we've honed our abilities to quickly and effectively locate roof leaks. Our systematic approach ensures that we leave no stone unturned in our quest to find the source of the problem. Trust our team to provide you with reliable and long-lasting roof leak repair solutions. Effective DIY Solutions for Repairing Roof Leaks in Older Homes In older homes, effective DIY solutions for repairing roof leaks require a thorough understanding of the underlying causes and a strategic approach to addressing the issues. When it comes to roof leak prevention, it's essential to identify and fix any existing problems promptly. One temporary roof leak repair option is to use roofing cement or sealant to seal small cracks or gaps in the roof. This can be done by applying the sealant directly to the damaged area, ensuring that it's spread evenly and covers the entire affected region. Another temporary solution is to use roofing tape, which can provide a quick fix for small leaks. This self-adhesive tape is designed to adhere to the roof surface and create a waterproof barrier. It's essential to clean and dry the area thoroughly before applying the tape to ensure maximum adhesion. Additionally, using a tarp or plastic sheeting to cover the affected area can provide temporary protection against further water damage. However, it's crucial to remember that these are temporary solutions and shouldn't replace a professional roof repair. It's advisable to consult with a roofing expert to assess the extent of the damage and determine the appropriate course of action. By taking a strategic approach and addressing the underlying causes of roof leaks in older homes, you can effectively repair and prevent further damage to your roof. Hiring a Professional for Roof Leak Repair in Older Homes Now that we've explored temporary DIY solutions for repairing roof leaks in older homes, it's imperative to recognize the importance of hiring a professional to tackle the task of roof leak repair. While DIY repairs can offer a quick fix, they may not address the underlying causes of the leak or provide a long-term solution. Hiring a professional not only ensures that the job is done correctly, but it also offers several other benefits. Here are three reasons why hiring professionals for roof leak repair in older homes is the best choice:
Preventive Measures to Avoid Future Roof Leaks in Older Homes Implementing proactive measures is crucial for preventing future roof leaks in older homes. Regular roof maintenance is essential to identify and address potential issues before they turn into major leaks. Here are some roof maintenance tips and waterproofing techniques that can help keep your older home dry and leak-free. Firstly, it's important to regularly inspect your roof for any signs of damage or wear. Check for missing or damaged shingles, cracked flashing, and deteriorated sealants. Addressing these issues promptly can prevent water from seeping into your home. Secondly, keep your gutters clean and free from debris. Clogged gutters can cause water to overflow and pool on your roof, leading to leaks. Regularly remove leaves, twigs, and other debris from your gutters to ensure proper drainage. Another preventive measure is to trim overhanging branches. Branches that touch or rub against your roof can cause damage to the shingles and create entry points for water. Trim back any branches that come in contact with your roof to minimize the risk of leaks. Additionally, consider applying a waterproofing coating or sealant to your roof. These products can help protect your roof from water damage and extend its lifespan. Consult with a professional to determine the best waterproofing solution for your specific roof type. Lastly, consider installing a roof ventilation system. Proper ventilation helps prevent moisture buildup in your attic, which can lead to roof leaks. A well-ventilated attic allows for the escape of hot, humid air, reducing the risk of condensation and water damage. Frequently Asked QuestionsHow Can I Prevent Roof Leaks in My Older Home?To prevent roof leaks in our older home, we've found a few effective methods. First, regular inspections and maintenance are crucial. We make sure to check for cracked or missing shingles, damaged flashing, and deteriorated seals around vents and chimneys. Secondly, addressing common causes of roof leaks, such as clogged gutters and inadequate insulation, helps prevent future issues. Lastly, investing in professional roof repairs or replacements when necessary ensures long-term protection. Are There Any Temporary Fixes for Roof Leaks in Older Homes?There are a few temporary solutions for roof leaks in older homes that you can try yourself. One option is to use roofing cement to seal any cracks or gaps in the roof. Another option is to apply a patch using a waterproof sealant. However, it's important to keep in mind that these fixes are only temporary and may not provide a long-term solution. It's always best to consult with a professional for a permanent fix. How Much Does It Typically Cost to Repair a Roof Leak in an Older Home?When it comes to roof leak repair in older homes, the cost can vary depending on several factors. Factors such as the extent of the damage, the type of roof material, and the location of the leak can all affect the overall cost. It's important to compare prices and get quotes from multiple contractors to ensure you're getting a fair price for the repair. Will Repairing a Roof Leak in an Older Home Increase Its Resale Value?Repairing a roof leak in an older home can definitely increase its resale value. By addressing this issue, potential buyers will see that the property has been well-maintained and that there are no hidden problems. A roof leak repair is a necessary home renovation that ensures the longevity and integrity of the structure. It shows that the homeowner has taken proactive measures to protect the property, making it more attractive and valuable in the real estate market. Can Roof Leaks in Older Homes Lead to Other Structural Issues?Roof leaks in older homes can lead to potential dangers and long term consequences. Water infiltration can weaken the structure, causing rot, mold, and damage to the foundation. Over time, this can compromise the integrity of the entire house. It's crucial to address roof leaks promptly to prevent further structural issues. Regular inspections and timely repairs are essential to maintain the safety and value of older homes. from https://universalroofs.ca/roof-repair-solutions/ultimate-guide-roof-leak-repair-in-older-homes/ Did you know that a roof leak can cause significant damage to your home if not addressed promptly? It's true. Water infiltration can lead to mold growth, weakened structural integrity, and costly repairs. That's why it's essential to tackle any leaks in your gutters and downspouts as soon as possible. In this discussion, we will explore the three best solutions for roof leak repair, ranging from quick DIY fixes to professional options. Whether you're a handy homeowner or prefer to leave it to the experts, there's something here for everyone. So, let's get started and ensure your home stays dry and protected. Quick DIY Fixes For a quick and effective solution to gutter and downspout leaks, consider these DIY fixes. When faced with a leaky gutter or downspout, temporary patches can provide an emergency repair until a permanent solution can be implemented. One temporary patch option is to use roofing cement. Start by cleaning the area around the leak with a wire brush to remove any debris or rust. Apply a generous amount of roofing cement directly onto the leak, making sure to cover the entire affected area. Smooth out the cement with a putty knife to create a watertight seal. This method is best suited for small leaks and can provide immediate relief until a more permanent repair can be made. Another temporary fix is to use a gutter sealant. This type of sealant is specifically designed to repair leaks in gutters and downspouts. Clean the area around the leak and apply the sealant directly onto the affected area. Use a caulking gun to ensure a precise application. Gutter sealant provides a strong, waterproof bond and can withstand various weather conditions. However, it's important to note that this is a temporary solution and a more permanent repair should be made as soon as possible. Professional Repair Options One effective option for repairing gutter and downspout leaks is to hire a professional to handle the repair work. While DIY fixes can be a quick and inexpensive solution for minor leaks, it's important to recognize that some leaks may require the expertise of a professional to ensure a proper and long-lasting repair. When it comes to roof leak detection, professionals have the necessary tools and knowledge to accurately identify the source of the leak. They can conduct a thorough inspection of your gutters and downspouts, looking for signs of damage or wear that may be causing the leak. By addressing the root cause of the problem, professionals can provide targeted repairs that will effectively resolve the issue. There are several common causes of gutter leaks that professionals are well-equipped to handle. One common cause is clogging. When debris such as leaves, twigs, or dirt accumulates in the gutter system, it can obstruct the flow of water and cause it to overflow, leading to leaks. Professionals can clean and unclog the gutters, ensuring that water can flow freely and preventing future leaks. Another common cause of gutter leaks is damaged or deteriorated gutters and downspouts. Over time, exposure to the elements can cause gutters and downspouts to rust, crack, or sag. Professionals can assess the condition of your gutter system and provide necessary repairs or replacements to restore its functionality. Preventive Maintenance Tips Regular maintenance is essential to prevent gutter and downspout leaks and ensure their optimal performance. By following these preventive maintenance tips, you can save yourself from expensive repairs and keep your gutters and downspouts in top condition:
Using the right tools for gutter and downspout maintenance is also crucial. Here are some essential tools you should have:
Regular maintenance and the use of essential tools will help you prevent common causes of gutter and downspout leaks, such as clogging, damage, and poor water flow. By taking these preventive measures, you can ensure the longevity and optimal performance of your gutters and downspouts. Frequently Asked QuestionsHow Can I Determine if the Leak in My Gutter Is Caused by a Problem With the Downspout?To determine if the leak in our gutter is caused by a problem with the downspout, we should conduct thorough downspout maintenance and inspect the gutter. By checking for any blockages or damage in the downspout, such as clogs or cracks, we can identify if it's the source of the leak. Additionally, a visual inspection of the gutter for signs of water pooling or overflow can indicate if the downspout isn't effectively directing water away from the gutter system. Are There Any Temporary Solutions to Fix a Roof Leak on Gutters and Downspouts During Heavy Rainfall?During heavy rainfall, we understand the urgency of finding temporary fixes for roof leaks on gutters and downspouts. DIY techniques can be helpful in these situations. It's important to first identify the source of the leak and address any clogs or blockages. Applying a waterproof sealant or using a patch kit can provide temporary relief until a permanent solution is implemented. Can a Gutter Leak Be Fixed Without Having to Replace the Entire Gutter System?Yes, a gutter leak can often be fixed without having to replace the entire gutter system. There are various gutter repair methods available that can effectively address the issue. These methods can range from applying sealants and patches to reinforcing the joints and connections. These cost-effective solutions can help prevent further water damage and maintain the functionality of your gutters and downspouts. What Are the Signs That Indicate It's Time to Seek Professional Help for Gutter and Downspout Repair?When it comes to gutter and downspout repair, it's crucial to recognize the warning signs that indicate it's time to seek professional help. Regular maintenance is of utmost importance to avoid costly repairs down the line. Signs such as water pooling around the foundation, sagging gutters, or visible cracks and leaks shouldn't be ignored. By addressing these issues promptly, we can prevent further damage and ensure the longevity of our gutter system. Are There Any Special Tools or Materials Needed for DIY Gutter and Downspout Repair?For DIY gutter and downspout repair, there are a few special tools and materials you might need. Some common tools include:
Materials that may be required include:
It's important to familiarize yourself with proper DIY gutter repair techniques before starting any repairs. This will ensure that you have the necessary tools and materials on hand for a successful repair job. from https://universalroofs.ca/roof-repair-solutions/3-best-solutions-for-roof-leak-repair-on-gutters-and-downspouts/ When it comes to the roof of your home, it's like a shield against the elements, protecting everything beneath it. But what happens when that shield develops a crack? Well, that's where we come in. In this ultimate guide, we'll be taking you through the ins and outs of roof leak repair for chimneys. Whether you've noticed a small drip or a full-blown cascade, we've got you covered. So, grab your tool belt and let's get started. Common Causes of Chimney Roof Leaks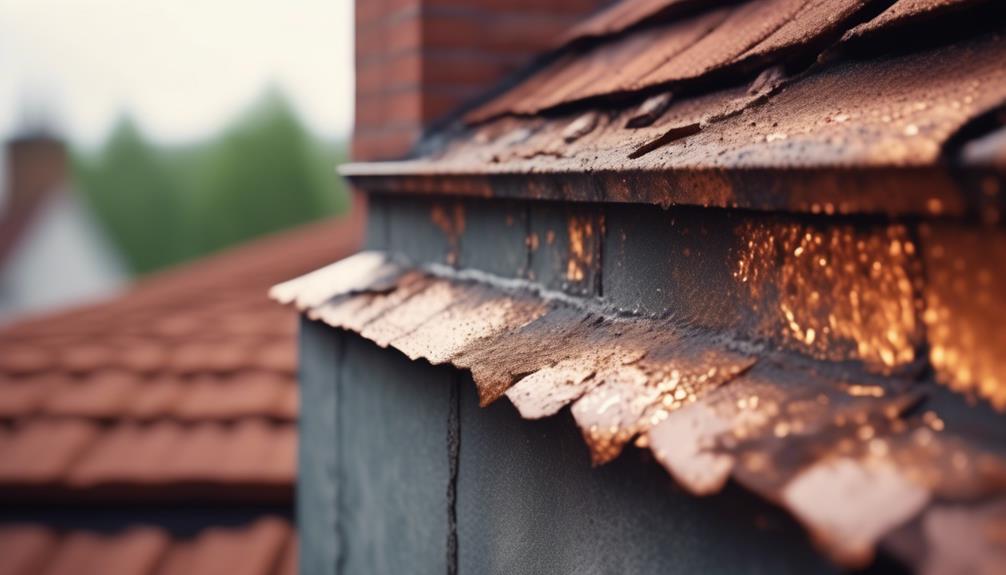 One of the most common causes of roof leaks around chimneys is damaged or deteriorated flashing. Chimney flashing is a thin strip of metal, typically made of aluminum or galvanized steel, that's installed to create a watertight seal between the chimney and the roof. Over time, exposure to the elements and temperature changes can cause the flashing to crack, corrode, or become loose, allowing water to penetrate the roof. To prevent chimney roof leaks, regular inspection and maintenance of the flashing is crucial. It's recommended to have a professional chimney inspector check the flashing at least once a year. They'll inspect for any signs of damage, such as rust, cracks, or gaps, and repair or replace the flashing if necessary. Additionally, applying a waterproof sealant around the flashing can help to further protect it from water penetration. Detecting chimney roof leaks can be challenging, as the source of the leak may not always be directly above the visible water stains. However, there are some common indicators of a chimney roof leak. These include water stains on the ceiling or walls near the chimney, dampness or moldy odor in the attic, or water dripping or pooling around the fireplace. It's important to address these signs promptly to prevent further damage to the roof and the interior of the home. Signs and Symptoms of a Chimney Roof Leak As homeowners, we need to be aware of the signs and symptoms that indicate a chimney roof leak. One common sign is water stains on the ceiling, particularly around the area where the chimney is located. Another indicator is dampness or moisture around the chimney, which can be felt or seen. Additionally, a musty odor in the home could be a sign of water intrusion through the chimney. Water Stains on CeilingWater stains on the ceiling are an unmistakable indication of a potential chimney roof leak. When you notice water stains on your ceiling, it's crucial to address the issue promptly to prevent further damage. Repairing water stains caused by a chimney roof leak involves not only fixing the leak itself but also addressing any resulting ceiling damage. To start, identify the source of the leak by inspecting the chimney, flashing, and surrounding areas. Depending on the extent of the damage, you may need to replace or repair the flashing, chimney crown, or even the entire chimney structure. Once the leak is fixed, it's essential to address the ceiling damage by repairing or replacing any damaged drywall or plaster. Finally, repaint the ceiling to restore its appearance. Dampness Around ChimneyExperiencing dampness around your chimney is a clear indication of a potential roof leak that requires immediate attention. This issue not only compromises the structural integrity of your chimney but also puts your entire roof at risk. It's crucial to address the problem promptly to prevent further damage. Here are some key signs and symptoms to watch for:
To resolve this issue, it's essential to employ effective waterproofing solutions and ensure regular chimney maintenance. By taking proactive measures, you can safeguard your chimney and prevent future leaks. Musty Odor in HomeIf you notice a musty odor in your home, particularly near the chimney, it could be a sign of a roof leak that needs immediate attention. A musty odor is often an indication of moisture and mold growth. When water enters through a chimney roof leak, it can create a damp environment that promotes mold growth. Mold not only affects the structural integrity of your home, but it also poses health risks and compromises indoor air quality. To prevent mold growth and ensure good indoor air quality, it's crucial to address chimney roof leaks promptly. Repairing the leak and waterproofing the chimney can help prevent future issues. Regular maintenance and inspections are essential in identifying and addressing roof leaks to protect your home and maintain a healthy living environment. Preparing for Chimney Roof Leak Repair To properly prepare for chimney roof leak repair, we recommend conducting a thorough inspection of the chimney and surrounding area. This will help identify any potential issues and determine the extent of the damage. Here are five important steps to take when preparing for chimney roof leak repair:
Tools and Materials Needed for Chimney Roof Leak Repair After thoroughly inspecting the chimney and surrounding area for any potential issues and damage, it's important to gather the necessary tools and materials for chimney roof leak repair. Choosing the right tools and materials is crucial to ensure the effectiveness and durability of the repair. When it comes to tools selection, there are a few essentials that you'll need. Firstly, you'll need a ladder to safely access the roof and chimney. Make sure to choose a sturdy and stable ladder that can support your weight. Additionally, having a safety harness or rope can provide an extra layer of protection. Next, you'll need a hammer and a pry bar to remove any damaged or loose shingles around the chimney. These tools will help you create a clean and smooth surface for the repair. In terms of materials, you'll need roofing cement or sealant to fix any cracks or gaps in the chimney flashing. Look for a high-quality, weather-resistant product that's specifically designed for chimney repairs. Additionally, you may need a chimney cap or crown to prevent future leaks. When it comes to application techniques, it's important to follow the manufacturer's instructions for the specific products you're using. Ensure that the area around the chimney is clean and dry before applying any sealant or cement. Use a putty knife or caulk gun to apply the product evenly and smoothly. Step-by-Step Guide to Patching a Chimney Roof Leak To successfully patch a chimney roof leak, it's important to follow a step-by-step guide that will ensure a thorough and effective repair. Here is a concise and detailed guide to help you fix your chimney roof leak:
Repairing Flashing Issues on Chimney Roofs Now let's shift our focus to addressing the common issue of flashing problems that can contribute to chimney roof leaks. Repairing flashing issues is crucial in preventing water from seeping into your chimney and causing damage. There are different techniques you can use to repair flashing, depending on the specific issue you're facing. One common flashing problem is when the flashing material becomes loose or damaged. To fix this, start by removing any old caulk or sealant around the flashing. Then, carefully lift the flashing and apply a new layer of roofing cement underneath. Secure the flashing back in place and seal the edges with caulk. This will create a watertight seal and prevent any further leaks. Another common issue is when the flashing material deteriorates over time. Common flashing materials include aluminum, copper, and galvanized steel. If you notice any signs of corrosion or rust on the flashing, it may be time to replace it. Start by removing the old flashing, making sure to clean the area thoroughly. Then, install new flashing using roofing nails or screws. Be sure to overlap the flashing properly and seal the edges with caulk. Fixing Leaks in Chimney Masonry Fixing leaks in chimney masonry requires a thorough assessment of the problem areas and the use of appropriate materials and techniques. It's essential to address these issues promptly to prevent further damage and ensure the longevity of your chimney. Here are some key steps to consider when fixing leaks in chimney masonry:
Replacing Damaged Chimney Roof Shingles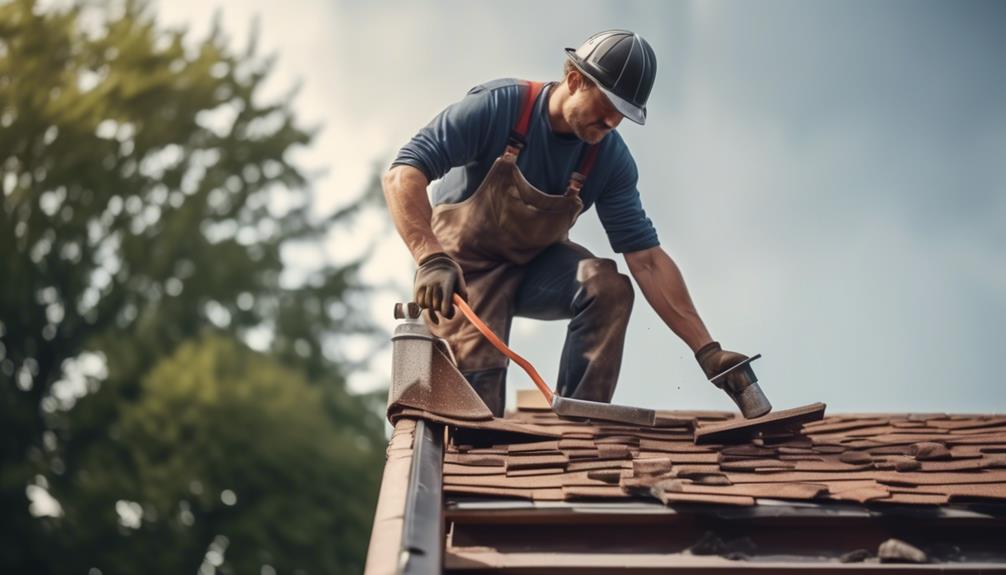 Replacing damaged chimney roof shingles is an important step in preventing water leaks and protecting the integrity of your chimney. Damaged shingles can allow water to seep into the chimney structure, leading to costly repairs and potential structural issues. When replacing chimney roof shingles, it's also a good opportunity to consider other chimney maintenance tasks, such as replacing chimney caps and implementing chimney waterproofing techniques. First and foremost, it's crucial to identify the damaged shingles that need to be replaced. Inspect the chimney roof carefully, looking for any signs of missing, cracked, or deteriorated shingles. Once identified, remove the damaged shingles by lifting the edges and carefully prying them away from the roof. Take care not to disturb the surrounding shingles or cause further damage. After removing the damaged shingles, it's time to install the new ones. Start by positioning the new shingle in place, making sure it aligns properly with the existing shingles. Nail it down securely, using roofing nails and following the manufacturer's instructions. It's important to ensure that the new shingle is firmly attached and properly sealed to prevent water infiltration. While replacing the damaged shingles, it's also a good time to consider other chimney maintenance tasks. For instance, if the chimney cap is damaged or missing, it should be replaced to prevent water and debris from entering the chimney flue. Additionally, applying chimney waterproofing techniques, such as using a waterproof sealant, can further protect the chimney from water damage. Preventative Measures for Avoiding Chimney Roof Leaks To ensure the long-term protection and integrity of your chimney, it's important to implement preventative measures that can effectively avoid roof leaks. Here are five key measures you can take to prevent chimney roof leaks:
Frequently Asked QuestionsHow Much Does Chimney Roof Leak Repair Typically Cost?Chimney roof leak repair cost can vary depending on several factors. Factors such as the extent of the damage, the materials needed for the repair, and the labor involved can all impact the overall cost. It's important to have a professional assess the situation and provide an estimate based on your specific needs. While there's no set price for chimney roof leak repair, considering these factors will give you a better understanding of what to expect. Can I Repair a Chimney Roof Leak on My Own, or Do I Need to Hire a Professional?We can definitely attempt to repair a chimney roof leak on our own using DIY methods. However, it's important to consider the benefits of hiring a professional. Professionals have the expertise and experience to accurately diagnose the issue and provide a long-lasting solution. They also have access to specialized tools and materials that may not be readily available to us. Hiring a professional ensures that the repair is done correctly, saving us time and potential future expenses. How Long Does It Usually Take to Repair a Chimney Roof Leak?Chimney roof leak repair time can vary depending on several factors. Factors affecting chimney roof leak repair time include the extent of the damage, the accessibility of the chimney, and the weather conditions. In general, it usually takes a few hours to a few days to repair a chimney roof leak. It's important to assess the situation properly and take the necessary steps to fix the leak promptly to prevent further damage to your chimney and home. Are There Any Temporary Fixes I Can Use Until I Can Get a Professional to Repair the Leak?Yes, there are temporary fixes you can try until a professional can repair the leak. DIY solutions include using roof sealant or caulk to seal any visible cracks or gaps around the chimney. You can also use a tarp or plastic sheeting to cover the chimney temporarily to prevent further water damage. However, it's important to remember that these fixes are temporary and shouldn't replace a professional repair to ensure a long-term solution. What Are the Potential Risks or Consequences of Neglecting a Chimney Roof Leak?Neglecting a chimney roof leak can have serious consequences. One statistic that paints a vivid picture is that water damage is responsible for 90% of all structural issues in buildings. The potential consequences of neglecting a chimney roof leak include mold and mildew growth, damage to the chimney structure, and even a fire hazard. Additionally, the water can seep into the walls and ceilings, causing further damage and potentially leading to costly repairs. It's crucial to address chimney roof leaks promptly to avoid these dangers. from https://universalroofs.ca/roof-repair-solutions/ultimate-guide-roof-leak-repair-for-chimneys/ As we venture into the intricate world of insurance coverage for roof leak repair, we find ourselves navigating through a maze of policies and procedures. Like a spider weaving its web, insurance companies create intricate layers of protection, each with its own set of terms and conditions. But fear not, for in this guide, we shall untangle the complexities and shed light on the path to successful reimbursement. So, let us embark on this journey together, uncovering the secrets to navigating the insurance landscape and ensuring your roof leak repairs are covered. Understanding Insurance Coverage for Roof Leak Repair Understanding insurance coverage for roof leak repair is essential for homeowners to ensure they're adequately protected in the event of a leak. Two important aspects to consider when it comes to insurance coverage are understanding insurance deductibles and negotiating with insurance adjusters. Insurance deductibles are the amount of money homeowners are required to pay out of pocket before their insurance coverage kicks in. It's crucial to have a clear understanding of the deductible amount specified in the insurance policy for roof leak repair. This amount can vary depending on the policy and can range from a few hundred to several thousand dollars. By knowing the deductible, homeowners can plan and budget accordingly for any potential roof leak repairs. Negotiating with insurance adjusters is another essential skill for homeowners. When filing a claim for roof leak repair, it's common for an insurance adjuster to be assigned to assess the damage and determine the amount the insurance company will cover. It's important for homeowners to be proactive and provide detailed documentation of the damage, including photographs and estimates from reputable contractors. By being well-prepared and organized, homeowners can effectively negotiate with the insurance adjuster to ensure they receive fair compensation for their roof leak repair. Types of Roof Leaks Covered by Insurance Now let's explore the scope of coverage for different types of roof leaks under insurance policies. When it comes to insurance coverage for roof leaks, it's important to understand the causes of roof leaks and the signs of roof damage that insurance companies typically consider eligible for coverage. Insurance policies generally cover roof leaks caused by sudden and accidental events, such as storms, fire, or vandalism. These types of roof leaks are typically covered under the dwelling coverage section of your homeowner's insurance policy. However, it's important to note that insurance companies may have exclusions or limitations for certain types of roof leaks, such as leaks caused by wear and tear or lack of maintenance. Signs of roof damage that may be covered by insurance include visible water stains on ceilings or walls, water dripping or pooling in the house, or damaged or missing shingles. Insurance companies may also consider covering roof leaks that result from a sudden and unforeseen event, such as a falling tree branch or a strong gust of wind that damages the roof. It's essential to document any signs of roof damage and take immediate action to prevent further damage, such as placing buckets to collect water or covering the affected area with a tarp. Contact your insurance company as soon as possible to report the roof leak and initiate the claims process. Remember to review your insurance policy carefully to understand the specific terms and conditions regarding roof leak coverage. It's also advisable to consult with a professional roofer or a licensed public adjuster who can help you navigate the insurance claims process and ensure that you receive the coverage you're entitled to. Steps to Take When Filing an Insurance Claim When filing an insurance claim for a roof leak, there are several important steps that should be taken to ensure a smooth and successful process. The first step is to contact your insurance company as soon as you discover the leak. Provide them with detailed information about the damage, including the date and time it occurred, the extent of the damage, and any relevant photographs or videos. It's crucial to document the damage thoroughly to support your claim. Next, schedule a meeting with an insurance adjuster to assess the damage. It's essential to be present during this inspection to ensure that all the damage is properly documented. Take notes and ask questions if necessary. This will help you understand the extent of your coverage and the amount you can expect for repairs. Once the inspection is complete, you'll receive a claim settlement offer from your insurance company. Review the offer carefully and compare it to your own estimates for repairs. If you believe the offer is too low, don't hesitate to negotiate with the insurance adjuster. Provide them with additional evidence, such as quotes from contractors or evidence of similar repairs in your area. Be persistent but polite during the negotiation process. If you're unable to reach a satisfactory agreement with the insurance adjuster, consider hiring a public adjuster or an attorney specializing in insurance claims. They can help you navigate the claims process and advocate for a fair settlement. Common Mistakes to Avoid When Claiming Roof Leak Repairs To ensure a successful claim for roof leak repairs, it is crucial to avoid common mistakes that can hinder the process and potentially affect your insurance coverage. Here are some tips for maximizing insurance coverage for roof leak repairs and steering clear of these pitfalls:
Documenting Roof Damage for Insurance Purposes When documenting roof damage for insurance purposes, we need to take detailed photographs of the damage from multiple angles to provide visual evidence. Additionally, we should gather repair estimates from reputable contractors to demonstrate the extent of the damage and the cost of repairs. It's also important to provide proof of ownership, such as receipts or invoices for previous repairs or maintenance, to establish our ownership and responsibility for the damaged roof. Photographing Roof DamageWe can effectively document roof damage for insurance purposes by taking detailed photographs. Photographs provide visual evidence of the extent of the damage, helping the insurance company assess the claim accurately. When photographing roof damage, it's important to capture the following details:
Gathering Repair EstimatesGathering repair estimates is a crucial step in documenting roof damage for insurance purposes. When it comes to getting multiple estimates, it's important to reach out to reputable roofing contractors who've experience in assessing and repairing roof damage. By obtaining estimates from at least three different contractors, you'll have a better understanding of the extent of the damage and the associated costs. This will allow you to negotiate repair costs with your insurance company more effectively. When reviewing the estimates, pay attention to the details provided, such as the scope of work, materials to be used, and timelines for completion. It's also important to consider the reputation and expertise of the contractors. Providing Proof of OwnershipTo provide proof of ownership and document roof damage for insurance purposes, homeowners must carefully gather and organize all relevant documents and records. This is crucial in order to establish their rightful claim for compensation. Here are three key steps to follow when proving ownership and verifying the extent of roof damage:
Factors That Affect Insurance Coverage for Roof Leaks Several key factors can significantly impact the insurance coverage for roof leaks. When it comes to roof leak insurance coverage, there are various factors that insurance companies consider when determining coverage eligibility and claim payouts. Understanding these factors can help homeowners navigate the insurance claim process for roof leak repairs more effectively. One of the primary factors affecting roof leak insurance coverage is the cause of the leak. Insurance companies typically cover roof leaks caused by sudden and accidental events, such as storms, fallen trees, or hail damage. However, leaks resulting from wear and tear, lack of maintenance, or pre-existing conditions may not be covered. It's essential for homeowners to thoroughly document the cause of the leak and provide evidence to support their claim. The age and condition of the roof are also crucial factors. Insurance companies may be less likely to provide coverage for older roofs or roofs that haven't been properly maintained. Regular roof inspections, maintenance, and repairs can help homeowners demonstrate that they've taken necessary precautions to prevent leaks and maintain their roof's condition. Additionally, the extent of the damage plays a significant role in insurance coverage. Insurance policies typically cover the cost of repairing the roof and any resulting interior damage, such as water damage to ceilings or walls. However, coverage may be limited to the actual cash value of the roof, which takes into account depreciation. Some policies may offer replacement cost coverage, which would cover the full cost of repairing or replacing the roof without factoring in depreciation. Lastly, homeowners should consider their insurance policy deductible. The deductible is the amount that the homeowner is responsible for paying before the insurance coverage kicks in. It's important to review the policy and understand the deductible amount, as it will affect the out-of-pocket expenses for roof leak repairs. How to Find a Reliable Roofing Contractor for Insurance Repairs When searching for a reliable roofing contractor to handle insurance repairs, homeowners should prioritize finding a contractor with a proven track record of quality work and expertise in dealing with insurance claims. Finding reputable contractors can be challenging, but by following these steps, homeowners can ensure they hire a reliable contractor for their insurance repairs:
Tips for Maximizing Your Insurance Coverage for Roof Leak Repair Maximizing your insurance coverage for roof leak repair requires proactive communication and thorough documentation. It's essential to understand how to negotiate with insurance adjusters effectively and maximize your insurance benefits. Here are some tips to help you make the most of your insurance coverage for roof leak repair. Firstly, it's crucial to review your insurance policy thoroughly. Familiarize yourself with the coverage limits, deductibles, and any exclusions related to roof leak repairs. This knowledge will empower you during negotiations with insurance adjusters. Secondly, when filing a claim, be prepared to provide detailed documentation. Document the damage with photographs or videos, and keep records of any communication with the insurance company. This documentation will serve as evidence during the claims process. Thirdly, consider obtaining multiple estimates from reputable roofing contractors. This will help you determine the accurate cost of the repairs and provide you with leverage when negotiating with insurance adjusters. Presenting multiple estimates can demonstrate that the claimed amount is reasonable and necessary for the repair work. Lastly, be proactive in your communication with the insurance company. Promptly report the roof leak and follow up on the progress of your claim. Keep a record of all conversations and correspondence. By staying engaged with the process, you can ensure that your claim receives the attention it deserves. Frequently Asked QuestionsWhat Are the Different Types of Roof Leaks That Are Not Covered by Insurance?When it comes to insurance coverage for roof leak repair, it's important to know that not all types of roof leaks are covered. Some common causes of roof leaks that may not be covered include lack of maintenance, wear and tear, and pre-existing damage. It's crucial to regularly inspect and maintain your roof to prevent leaks. By addressing issues promptly and taking preventive measures like cleaning gutters and trimming trees, you can minimize the risk of roof leaks and potentially avoid costly repairs. Can I File an Insurance Claim for Roof Leak Repair if the Damage Was Caused by My Own Negligence?When it comes to filing an insurance claim for roof leak repair, it's important to understand the role of negligence in determining coverage. If the damage was caused by our own negligence, such as failing to properly maintain the roof or ignoring obvious signs of damage, it's unlikely that the insurance claim will be approved. Insurance companies typically require homeowners to take reasonable precautions to prevent damage. Therefore, it's crucial to regularly inspect and maintain our roofs to ensure coverage in case of unforeseen leaks. Are There Any Specific Documents or Evidence That I Need to Provide When Filing an Insurance Claim for Roof Leak Repair?When filing an insurance claim for roof leak repair, there are specific evidence requirements and documentation needed. It's important to provide proof of the damage, such as photographs or videos, as well as any invoices or receipts for repairs. Additionally, insurance companies may require a detailed description of the incident and the cause of the leak. Will My Insurance Coverage for Roof Leak Repair Be Affected if I Have Previously Filed Multiple Claims for the Same Issue?Having previously filed multiple claims for the same roof leak issue can potentially have an impact on our insurance coverage for future repairs. The effect of these previous claims will depend on various factors, such as the specific terms and conditions of our insurance policy, the severity of the issue, and the frequency of claims. It's important to review our policy and consult with our insurance provider to understand how multiple claims may affect our coverage for roof leak repair. Is It Possible to Negotiate With My Insurance Company for a Higher Coverage Amount for Roof Leak Repair?Negotiating coverage with our insurance company for a higher amount for roof leak repair is possible. It's important to understand the insurance claim process to increase our chances of success. By providing evidence such as repair estimates and documentation of the damage, we can make a strong case for higher coverage. Research shows that policyholders who negotiate their claims can receive higher payouts, sometimes up to 20% more. from https://universalroofs.ca/roof-repair-solutions/insurance-coverage-for-roof-leak-repair-a-how-to-guide/ Have you ever wondered why vent pipes, those slender tubes jutting out from the roof, can be the culprit behind annoying roof leaks? Well, let me shed some light on this perplexing issue. Vent pipes, like pesky spies, can infiltrate your roof's defenses and cause unwanted leaks. But fear not, dear reader, for in this discussion, we will unravel the mystery behind these leaks and explore the reasons behind their occurrence. So, grab your detective hats and join me on this journey as we uncover the secrets of vent pipe-induced roof leaks. Common Causes of Vent Pipe Leaks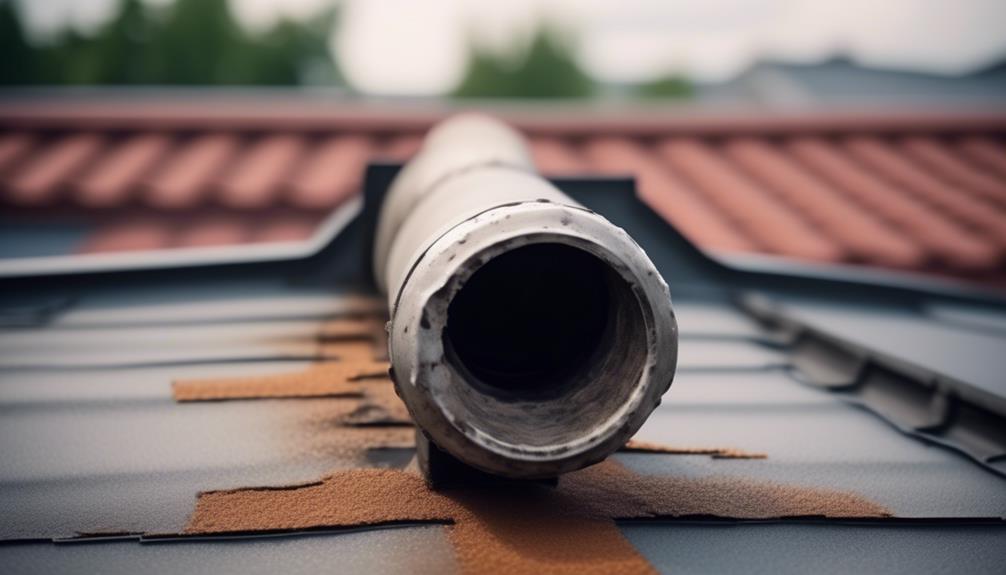 One of the most common causes of vent pipe leaks is improper installation. When vent pipes aren't installed correctly, they can become a major source of roof leaks. It's important to understand the proper installation techniques to avoid this issue. Regular maintenance is crucial in preventing vent pipe leaks. Over time, vent pipes can deteriorate due to exposure to weather elements such as rain, snow, and UV rays. By conducting regular inspections and maintenance, you can identify any potential issues before they escalate into larger problems. DIY vent pipe repairs can be tempting, but it's important to approach them with caution. While some minor repairs can be done by homeowners, it's recommended to seek professional assistance for major repairs or replacements. Incorrect repairs can lead to further damage and potential leaks. To maintain the integrity of your vent pipes, regular cleaning is necessary. Debris such as leaves, twigs, and even bird nests can accumulate in the vents, obstructing proper airflow and causing leaks. Cleaning the vents periodically will help prevent this issue. Importance of Proper Vent Pipe Installation Improper vent pipe installation can lead to significant roof leaks, compromising the integrity of your entire roofing system. That's why it's crucial to understand the importance of proper vent pipe installation and the benefits of regular maintenance to ensure the longevity and efficiency of your roof. Proper vent pipe installation plays a vital role in preventing roof leaks. When vent pipes aren't installed correctly, they can create gaps and openings in the roof structure, allowing water to seep in during heavy rain or snow. This can lead to water damage, mold growth, and structural issues in your home. By having vent pipes installed properly, you can avoid these problems and maintain a watertight roof. Regular maintenance is equally important for the longevity of your roof. Over time, vent pipes can deteriorate due to exposure to harsh weather conditions, temperature fluctuations, and aging. Regular inspection and maintenance of vent pipes can help identify any signs of damage or wear and tear early on, allowing for timely repairs or replacements. This proactive approach can prevent leaks and other roofing issues from occurring, saving you both time and money in the long run. Proper ventilation is another benefit of installing vent pipes correctly. Vent pipes allow for the proper circulation of air in your attic, preventing moisture buildup and reducing the risk of mold and mildew growth. Adequate ventilation helps regulate the temperature in your attic, preventing excessive heat buildup and potential damage to your roof's shingles or other roofing materials. Signs of a Leaking Vent Pipe When it comes to identifying a leaking vent pipe, there are several signs to look out for. Common indicators include:
It's important to address these signs promptly to prevent further damage and costly repairs. Common Leak CausesLeaking vent pipes can often be identified by visible water stains on the ceiling or walls. These stains are a clear indication that there's a problem with the vent pipe system. While there can be various causes for vent pipe leaks, some common issues can be easily identified and resolved. One common problem is a damaged or cracked vent pipe boot. The boot is a rubber or metal cover that surrounds the vent pipe where it exits the roof. Over time, it can deteriorate due to exposure to the elements, causing water to seep in. Another common issue is improper installation or sealing of the vent pipe flashing. The flashing is a metal piece that creates a watertight seal between the vent pipe and the roof. If it isn't installed correctly or becomes loose, water can enter the roof through the gap. Furthermore, blocked or clogged vent pipes can also lead to leaks. Debris, such as leaves, twigs, or bird nests, can accumulate in the pipe, obstructing the flow of air and causing water to back up and leak through the roof. To troubleshoot vent pipe leaks, it's crucial to inspect the condition of the vent pipe boots, check for proper installation and sealing of the flashing, and ensure that the vent pipes are free from any blockages. By addressing these common issues, homeowners can prevent and resolve vent pipe leaks effectively. Repair and Prevention MethodsAs we move into discussing repair and prevention methods for vent pipe leaks, it's important to address the signs that indicate a leaking vent pipe. Being able to identify these signs early on can help prevent further damage to your roof. Here are a few key indicators to look out for:
When it comes to repairing a leaking vent pipe, the first step is to identify the type of material used for the pipe. Common vent pipe materials include PVC, cast iron, and copper. Once you have determined the material, you can proceed with a DIY repair or seek professional assistance. DIY vent pipe repair methods may include replacing damaged flashing, applying sealant to cracks or gaps, or replacing damaged sections of the vent pipe itself. Remember to prioritize safety and consult a professional if you're unsure about any aspect of the repair process. Factors That Contribute to Vent Pipe Leaks Several key factors can contribute to the occurrence of vent pipe leaks in a roofing system. Understanding these factors is crucial in preventing and addressing such leaks. One of the primary factors affecting roof leaks is the impact of weather on vent pipes. Weather conditions play a significant role in the development of vent pipe leaks. Extreme temperature changes, such as freezing and thawing cycles, can cause the vent pipes to expand and contract, leading to cracks or gaps in the seals. Additionally, heavy rain, snow, or hail can damage the flashing around the vent pipes, compromising their integrity and allowing water to seep in. Another factor that contributes to vent pipe leaks is improper installation or maintenance. If the vent pipes aren't installed correctly or if they aren't regularly inspected and maintained, they're more likely to develop leaks. Poor installation can result in inadequate sealing, while lack of maintenance can lead to deterioration of the vent pipe materials or the flashing. The materials used for vent pipes can also impact their susceptibility to leaks. Vent pipes made from low-quality materials may deteriorate faster, making them more prone to cracks and leaks. Similarly, using incompatible materials for flashing or sealant can result in ineffective seals and potential leaks. Lastly, the design and placement of vent pipes can affect their vulnerability to leaks. Vent pipes that are poorly designed or have inadequate slope can accumulate water and debris, increasing the risk of leaks. Additionally, placing vent pipes too close to other roof features, such as chimneys or skylights, can create areas of vulnerability where leaks are more likely to occur. Understanding these factors is essential in addressing and preventing vent pipe leaks. By considering the impact of weather, ensuring proper installation and maintenance, using high-quality materials, and optimizing the design and placement of vent pipes, homeowners can minimize the risk of leaks in their roofing systems. How to Identify the Source of the Leak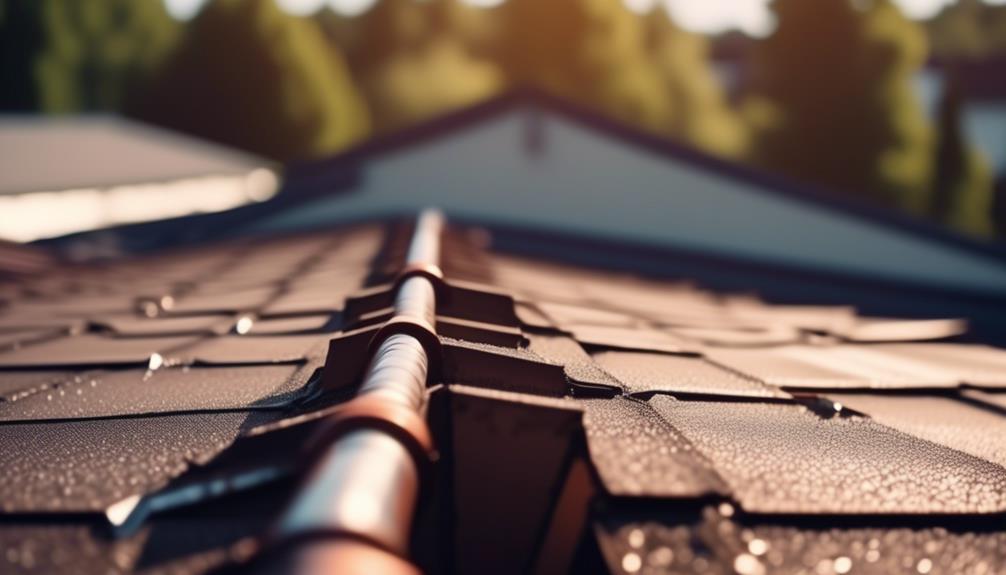 To accurately identify the source of a roof leak, homeowners should conduct a thorough inspection of the affected area using visual and tactile methods. Here are some steps to troubleshoot leaks and identify the source:
Steps to Repair a Leaking Vent Pipe What are the necessary steps to effectively repair a leaking vent pipe on your roof? When it comes to fixing a leaky vent pipe, it's crucial to follow a systematic approach. By taking the appropriate steps and using the right materials, you can ensure a successful repair that will prevent further damage to your roof. Here are the steps you need to take:
Preventive Measures to Avoid Future Leaks To prevent future leaks, we must prioritize vent pipe maintenance. This involves ensuring that the vent pipes are clear of debris and properly sealed. Proper installation techniques, such as using high-quality materials and securely fastening the pipes, are crucial in preventing leaks. Regular roof inspections are also essential. These inspections help identify any potential issues early on and allow for prompt addressing of the problems. By doing so, the risk of leaks in the future is minimized. Vent Pipe MaintenanceRegular maintenance of vent pipes is crucial for preventing future leaks and ensuring the proper functioning of the roof. To maintain vent pipes effectively and avoid common leak causes, the following steps should be taken:
Proper Installation TechniquesProper installation techniques are essential for preventing future roof leaks, ensuring the longevity and functionality of the vent pipe system. When it comes to vent pipe installation, there are several common causes of leaks that can be avoided with the right techniques. One important aspect is ensuring a secure and watertight connection between the vent pipe and the roof flashing. This can be achieved by using high-quality sealants and properly fastening the vent pipe to the flashing. Additionally, it's crucial to properly slope the vent pipe to prevent water from pooling and causing leaks. This can be achieved by ensuring a downward slope of at least 1/4 inch per foot towards the roof. Lastly, proper sealing of any joints or seams in the vent pipe system is imperative to prevent water infiltration. Regular Roof InspectionsAfter ensuring proper installation techniques, the next step to prevent future roof leaks caused by vent pipes is to regularly inspect the roof. Regular maintenance plays a crucial role in identifying potential hazards and addressing them before they become major issues. Here are three key areas to focus on during roof inspections:
Regular roof inspections, coupled with timely repairs and maintenance, are essential in ensuring the longevity and integrity of your roof, protecting your home from potential hazards caused by vent pipe leaks. Common Mistakes to Avoid During Vent Pipe Repair One mistake to steer clear of when repairing vent pipes is neglecting to properly seal the joints. This is a common DIY mistake that can lead to roof leaks and further damage. When vent pipes aren't sealed correctly, water can seep through the gaps and penetrate the roof, causing leaks and potential structural issues. To avoid this mistake, it's important to ensure that all joints and connections are properly sealed. This can be done using roofing sealant or silicone caulk. Before applying the sealant, it's crucial to clean the area thoroughly and remove any debris or old sealant. This will help the new sealant adhere properly and create a watertight seal. Another common mistake to avoid during vent pipe repair is using the wrong materials. It's essential to use materials that are specifically designed for vent pipe repair, such as rubber pipe boots or flashing. Using improper materials can compromise the integrity of the repair and lead to future leaks. Additionally, it's important to pay attention to the installation of the vent pipe. One common mistake isn't providing enough clearance around the pipe. Vent pipes should have at least two inches of clearance from any combustible materials, such as insulation or wood. This helps prevent heat transfer and reduces the risk of fire hazards. Hiring a Professional for Vent Pipe Leak Repair When seeking professional assistance for vent pipe leak repair, it's important to hire a qualified and experienced contractor who specializes in this type of work. Vent pipe leaks can be complex and require specific knowledge and skills to diagnose and fix them accurately. Here are some reasons why hiring a professional for vent pipe leak repair is crucial:
Frequently Asked QuestionsHow Much Does It Cost to Repair a Leaking Vent Pipe?When it comes to repairing a leaking vent pipe, the costs can vary depending on several factors. Professional repair services typically charge a fee for their expertise and labor, which can range from a few hundred to a few thousand dollars. On the other hand, if you're skilled and confident in your abilities, you can attempt a DIY repair using materials that can be purchased at a hardware store for a fraction of the cost. It's important to weigh the costs and benefits before deciding which route to take. Can I Repair a Leaking Vent Pipe by Myself, or Do I Need to Hire a Professional?Can we handle a leaking vent pipe repair ourselves or should we bring in a professional? When it comes to DIY vent pipe repair, it's important to consider the complexity of the job. While some minor leaks can be fixed with basic tools and materials, more serious issues may require the expertise of a professional plumber. Hiring a professional offers numerous benefits, including their knowledge, experience, and access to specialized equipment. Are There Any Health Risks Associated With a Leaking Vent Pipe?There can be health risks associated with a leaking vent pipe. When a vent pipe leaks, it can lead to moisture buildup, which can create a breeding ground for mold and mildew. This can cause respiratory problems and allergies for the occupants of the building. Additionally, if the vent pipe isn't properly sealed, it can also lead to ventilation issues, which can affect the overall air quality in the building. It's important to address any vent pipe leaks promptly to avoid these potential health risks and ventilation issues. Can a Leaking Vent Pipe Cause Structural Damage to My Roof?Leaking vent pipes can indeed cause structural damage to our roof. When vent pipes aren't properly sealed or maintained, water can seep into the surrounding areas, leading to moisture buildup and deterioration of the roof's structure. Signs of structural damage caused by leaking vent pipes include:
It's crucial to address these issues promptly to prevent further damage and ensure the integrity of our roof. How Long Does It Take to Repair a Leaking Vent Pipe?When estimating the time it takes to repair a leaking vent pipe, several factors come into play. These include:
Common causes of vent pipe leaks can include:
It's crucial to address these issues promptly to prevent further damage to the roof and ensure the longevity of the repair. from https://universalroofs.ca/roof-repair-solutions/why-do-vent-pipes-cause-roof-leaks/ Flashing, like a knight in shining armor, plays a crucial role in protecting our roofs from the relentless onslaught of leaks. But why is it so important, you might ask? Well, dear reader, let me tell you: the proper installation and maintenance of flashing can mean the difference between a dry and cozy home and a damp disaster waiting to happen. In this discussion, we will explore the purpose of flashing, its role in preventing leaks, the importance of its installation, and the benefits of using high-quality materials. So buckle up, because we're about to embark on a journey that will shed light on this essential aspect of roof leak repair. Purpose of Flashing in Roof Repair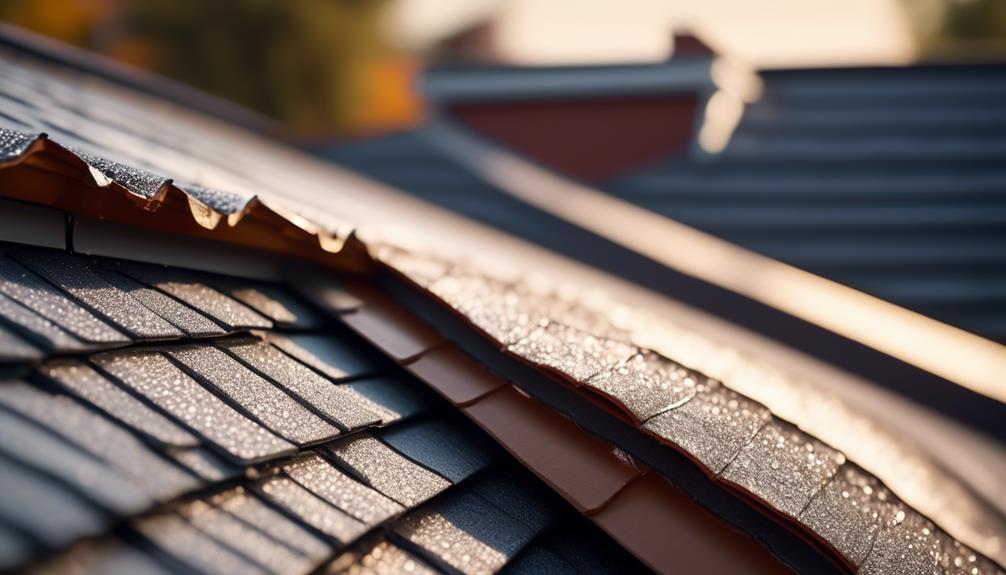 Flashing plays a crucial role in roof repair, effectively preventing water leaks by providing a protective barrier against moisture penetration. Understanding the purpose of flashing in roof repair is essential for ensuring the longevity and durability of the roof. Flashing materials are specifically designed to redirect water away from vulnerable areas, such as roof joints, chimneys, skylights, and vents. These materials are typically made from durable metals, such as aluminum or galvanized steel, which can withstand exposure to harsh weather conditions. Additionally, flashing materials are often coated with a protective layer to enhance their resistance to corrosion and rust. Flashing techniques involve the proper installation of the flashing materials to create a watertight seal. The flashing is strategically placed in areas where water is prone to accumulate and penetrate the roof. This includes valleys, where two roof slopes meet, and roof penetrations, such as chimneys or vent pipes. The flashing is carefully shaped and molded to fit the contours of these areas, ensuring a tight and secure seal. Proper flashing techniques also involve overlapping the flashing materials to provide an additional layer of protection against water intrusion. This overlapping method helps to create a continuous barrier that prevents water from seeping through the gaps. Regular inspection and maintenance of the flashing are crucial to ensure its effectiveness. Over time, flashing materials may deteriorate due to exposure to UV rays, extreme temperatures, and other environmental factors. Periodic inspections allow for the identification of any damage or wear and tear, enabling prompt repairs or replacements to maintain the integrity of the flashing system. Role of Flashing in Preventing Leaks When it comes to preventing leaks, flashing plays a crucial role in waterproofing your roof. Proper installation techniques are essential in ensuring that the flashing effectively diverts water away from vulnerable areas, such as roof intersections and transitions. Common materials used for flashing include aluminum, copper, and galvanized steel, each with its own advantages and considerations. Waterproofing With FlashingTo ensure effective waterproofing and prevent leaks, it's crucial to understand the vital role that flashing plays in safeguarding roofs. Flashing is an essential component of roof leak repair and serves as a protective barrier against water penetration. There are various waterproofing techniques available, but flashing is widely recognized as one of the most reliable methods. It involves the installation of thin strips of impervious material, such as metal or plastic, around vulnerable areas of the roof, such as chimneys, skylights, and vents. These strips are strategically placed to create a watertight seal, preventing water from seeping into the underlying structure. Common types of flashing materials include aluminum, copper, and rubberized asphalt. Each material offers different advantages in terms of durability, flexibility, and resistance to weathering, allowing for customized solutions based on specific roofing needs. Proper Installation TechniquesProper installation techniques play a crucial role in preventing leaks by ensuring the effective function of flashing on roofs. When it comes to roof leak repair, the importance of proper flashing maintenance and professional installation can't be overstated. Here are three key reasons why:
Common Flashing MaterialsFlashing materials are essential components in preventing leaks by creating a secure and watertight barrier on roofs. The type of flashing material used can greatly impact the effectiveness of the flashing installation techniques. There are several common types of flashing materials that are widely used in the industry. These materials include:
Choosing the right flashing material depends on factors such as climate, budget, and aesthetic preferences. It is important to consult with a roofing professional to determine the most suitable material for your specific needs. Importance of Proper Flashing Installation Proper flashing installation is crucial for preventing water damage and leaks in a roof. When flashing isn't installed correctly, it can lead to water penetration and costly repairs. Flashing Prevents Water DamageTo ensure optimal protection against water damage, it's crucial to prioritize the correct installation and maintenance of flashing. Proper flashing installation techniques offer several benefits, including:
Proper flashing installation not only safeguards your roof but also protects your entire home or building from water damage. It's an essential aspect of roof leak repair and maintenance. Proper Installation Prevents LeaksAs we continue our discussion on roof leak repair and the importance of flashing, let's now delve into the significance of proper installation in preventing leaks. Proper flashing installation techniques are crucial in ensuring a watertight seal between the roof and other structural elements, such as chimneys, skylights, and vent pipes. When flashing isn't installed correctly, it can lead to common flashing problems, including water infiltration, rot, and mold growth. To prevent these issues, it's essential to follow industry best practices when installing flashing. This includes properly overlapping and sealing flashing joints, using appropriate flashing materials for specific areas, and ensuring proper integration with the roofing system. Flashing Ensures Long-Lasting ProtectionFlashing installation plays a critical role in ensuring the long-lasting protection and integrity of a roof. Properly installed flashing acts as a barrier against water, preventing leaks and potential damage to the structure. Here are three important flashing techniques and maintenance tips to ensure optimal protection:
Common Flashing Problems to Watch Out for We frequently encounter common problems with flashing that require immediate attention. Proper maintenance of flashing is crucial to ensure the longevity and effectiveness of your roofing system. Over time, flashing can deteriorate due to various factors, such as exposure to harsh weather conditions or poor installation. It's important to be aware of the signs of deteriorating flashing so that you can address any issues promptly. One common problem with flashing is corrosion. Corrosion can occur when flashing materials, such as metal, come into contact with moisture or chemicals. Signs of corrosion include rust or discoloration on the flashing. If left untreated, corroded flashing can lead to leaks and water damage. Another common issue is cracked or damaged flashing. This can happen due to aging, improper installation, or physical damage. Cracked flashing allows water to seep into the vulnerable areas of your roof, causing leaks and potential structural damage. It's essential to inspect your flashing regularly and address any cracks or damage immediately. Improper sealing is also a common problem with flashing. If the flashing isn't properly sealed to the roof or other components, water can easily penetrate the gaps and cause leaks. It's important to ensure that the flashing is securely and tightly sealed, using appropriate sealants or adhesives. Lastly, inadequate flashing overlap can lead to water infiltration. When flashing pieces aren't overlapping correctly, gaps are exposed, allowing water to enter. It's crucial to ensure that the flashing pieces are installed with the correct overlap to provide a watertight barrier. Benefits of Using High-Quality Flashing Materials Using high-quality flashing materials is essential for ensuring the durability and effectiveness of your roofing system. The flashing is a crucial component that helps prevent water from seeping into your roof and causing leaks. Investing in high-quality flashing materials offers several benefits that contribute to the overall longevity and performance of your roof. Here are the top three benefits of using high-quality flashing materials:
How Flashing Enhances the Longevity of Roof Repairs To further understand the importance of high-quality flashing materials, let's explore how they enhance the longevity of roof repairs. Proper flashing techniques and regular flashing maintenance are crucial aspects of roof leak repair that contribute to the overall durability and lifespan of the roof. Flashing techniques involve the installation of metal or waterproof materials in vulnerable areas of the roof, such as valleys, chimneys, skylights, and roof edges. These flashing materials act as a barrier, preventing water from seeping into the roof structure and causing damage. By effectively diverting water away from these vulnerable areas, flashing reduces the risk of leaks and subsequent roof repairs. In addition to proper installation, regular flashing maintenance plays a significant role in extending the lifespan of roof repairs. Over time, flashing materials can deteriorate due to exposure to the elements, such as UV radiation, extreme temperatures, and moisture. It's essential to inspect the flashing regularly and address any signs of damage promptly. If flashing is damaged or improperly maintained, it can compromise the integrity of the roof and lead to leaks. Water infiltration can cause rotting of the underlying materials, mold growth, and structural damage. By regularly inspecting and maintaining the flashing, potential issues can be identified early on and addressed before they escalate into more extensive and costly repairs. Frequently Asked QuestionsWhat Are the Different Types of Flashing Materials Commonly Used in Roof Leak Repair?When it comes to roof leak repair, using different types of flashing materials is crucial. These materials, such as metal, rubber, or plastic, serve as a protective barrier against water infiltration. They're specifically designed to redirect water away from vulnerable areas, preventing leaks and potential damage. The benefits of using flashing materials in roof leak repair include enhanced durability, increased lifespan of the roof, and improved energy efficiency. How Often Should Flashing Be Inspected and Replaced?Regular flashing maintenance is crucial for preventing roof leaks and preserving the integrity of the structure. Over time, flashing can deteriorate due to various factors, such as exposure to harsh weather conditions, age, and improper installation. Inspecting and replacing flashing on a regular basis ensures that any potential issues are identified and addressed promptly, preventing costly water damage and structural issues. By prioritizing regular flashing maintenance, homeowners can protect their investment and maintain a safe and secure roof. Can Flashing Be Installed on Any Type of Roof?When it comes to flashing installation, it's crucial to consider the type of roof. Different roofs require different flashing techniques. However, regardless of the roof type, flashing plays a crucial role in preventing roof leaks. It acts as a protective barrier, sealing the vulnerable areas where the roof meets other structures like chimneys or vents. This prevents water from seeping in and causing damage. What Are Some Signs That Indicate the Need for Flashing Repair or Replacement?When it comes to signs indicating flashing repair or replacement, there are a few key things to look out for. Damaged or missing flashing can lead to water leaks, which can cause serious damage to your roof and the interior of your home. If you notice water stains on your ceiling or walls, or if you see any signs of water damage around your roof, it's important to have your flashing inspected and repaired as soon as possible. Regular maintenance of flashing is crucial to ensure the overall integrity of your roof and prevent costly leaks. Are There Any Alternative Methods or Products That Can Be Used Instead of Traditional Flashing for Roof Leak Repair?Well, let me tell you, when it comes to roof leak repair, traditional flashing is the go-to method. However, if you're feeling adventurous, there are alternative methods that can be used. One such method is liquid flashing. This innovative product is applied as a liquid and then dries to form a waterproof seal. It's a great option for those hard-to-reach areas or for when traditional flashing just won't cut it. from https://universalroofs.ca/roof-repair-solutions/why-is-flashing-important-for-roof-leak-repair/ |
Universal Roofs
We are the Toronto Roofers that prove topnotch solutions to all your roofing needs, from roof repair to new roof installations. ArchivesNo Archives Categories |
 RSS Feed
